Gluten-free Sourdough Bread

Just before Melbourne went into Covid-related lockdown for the fifth time, I joined a gluten-free sourdough bread-making class at a nearby cafe. Their chef, Dom Marzano, shared tips on how to bake a tasty, white, gluten-free sourdough loaf just like they sell in the cafe. I found that their recipe worked just as well with my sourdough starter – a revelation! The secret to achieving a great loaf was not to use a special sourdough starter, but simply use the right flour mix. In this case, the flour mix is the Well & Good Crusty Bread Mix, which sells for about $6 for a 410g pack.

Many gluten-free sourdough bread recipes that I’ve come across require a few exotic flours, so $6 to bake a loaf is reasonable. The Well & Good flour mix magic seems to come from its particular combination of thickeners, which include usual suspects like xanthan gum, guar gum and psyllium husk, plus some others. They’ve done the science to figure out how to make gluten free flours behave like wheat flour, and now I don’t have to.

I maintain a sourdough starter at just 60g, so the recipe below starts from this basis and explains how to build it up and then turn it into a loaf of bread over four days, ready to eat on the morning of the fifth day. It slices up pretty well, so I would say it’s worth the wait!
In the instructions below, I use normal Melbourne tap water (not any warmer than a tepid temperature). If you’re in another region, you may prefer to use bottled water, or boil and then cool tap water instead. Also, I use a half-half mix of brown rice and glutinous rice flour to bulk up the starter to the right amount to bake a loaf, but you can use whatever you’ve been feeding your starter, or even the same Well & Good Crusty Bread mix to keep it simple (if you have extra).

Ingredients – Day 1

  • 60g of sourdough starter (from the fridge)
  • 45mL (at least) water
  • 45g flour (half-half brown rice flour and glutinous rice flour)

Method – Day 1

  1. Get the sourdough starter out of the fridge at the start of the day, and leave somewhere warm like the kitchen. Wait a few hours until it has warmed up and is looking bubbly.
  2. Follow the process previously described in the sourdough starter post under the feeding regime, but instead of discarding the remaining starter into the discard jar that’s kept in the fridge, put it in its own small container.
  3. Follow the feeding regime for the starter that is in this small container, but scaled appropriately to the amount that is in there. Assuming 25g of starter has gone into the small container, add 25g of water and 25g of flour. There should be no left over starter to go into the discard jar. You will now have both the starter jar and the small container with similar amounts of sourdough starter in it.
  4. Wait a few hours for the starter in the starter jar to have very tiny bubbles, and put it back into the fridge. However, do not put the small container into the fridge – leave it out on the bench or wherever you had it before. It doesn’t matter if it gets cold overnight.

Ingredients – Day 2

  • 70g of starter from Day 1
  • 70mL (at least) water
  • 70g flour (half-half brown rice flour and glutinous rice flour)

Method – Day 2

  1. About 24 hours after the starter was put into the small container (perhaps around midday), it should look bubbly and is ready to do the feeding regime again, which will triple its weight. Scrape the starter into a medium container, and weigh it.
  2. Follow the feeding regime again for the starter that is in this container, but scaled appropriately to the amount that is in there. Assuming 70g of starter has gone into the medium container, add 70g of water and 70g of flour. Again, there is no discard.
  3. Leave the medium container out on the kitchen bench or somewhere warm.

Ingredients – Day 3

  • 200g of starter from Day 2
  • 300mL water
  • 400g Well & Good Crusty Bread mix (or equivalent speciality bread flour)
  • 20mL olive oil
  • 5g table salt
  • fine rice flour for dusting

Method – Day 3

  1. About 24 hours after the starter was put into the medium container (perhaps around midday), it should look bubbly and is ready. Prepare a banneton, or proofing basket, by dusting with fine rice flour and knocking it around to ensure it is even. If you don’t have a banneton, you can use a ricotta basket or even a plastic colander (if the holes are big, you can also put a cotton tea towel in it first).
  2. Scrape it into a mixing bowl, along with all the other ingredients, and mix with a dough hook. You can also use a spoon and/or your hands, but that will be a bit messier. Unlike with a gluten-based dough, you don’t need to mix and pound it for ages. After 2 or 3 minutes, it should have been combined together sufficiently.
  3. Put a small amount of oil on your hands to prevent the dough sticking, and pull the dough out with your hands, shaping it into a ball. If it is really sticky and the surface is rough, that’s not a problem.
  4. Push the dough ball into the banneton so it is flattened against the bottom. Protect the dough from drying out by spraying oil onto some cling film that is stretched over the top of the banneton, or just put the whole banneton in a plastic freezer bag.
  5. Leave the banneton out on the kitchen bench or somewhere warm.

Ingredients – Day 4

  • Dough from Day 3

Method – Day 4

  1. About 24 hours after the dough was left to rise, it should have doubled in size. You can let it go longer (say 36 hours) if the room has been a bit cold overall and it needs it to achieve the doubling. It is now ready to bake!
  2. Set oven to 220 degrees Celcius, and place a cast iron dutch oven in there with the lid on, to warm up. Leave it at least 30 mins from when the oven is at temperature so that the dutch oven is definitely hot. I use a 4.7L dutch oven, which works well, but you can go bigger. If you don’t have a dutch oven, you can apparently use a pizza stone together with a foil cover. However, using a dutch oven or a bessemer pot is the recommended way to go, as it provides heat while retaining moisture during the expansion phase of the baking.
  3. Remove the plastic (cling film or freezer bag) cover from the banneton. Get a large piece of baking paper ready, and place this on top of the dough. Gently invert the banneton so the dough comes out of the banneton and is resting on the baking paper.
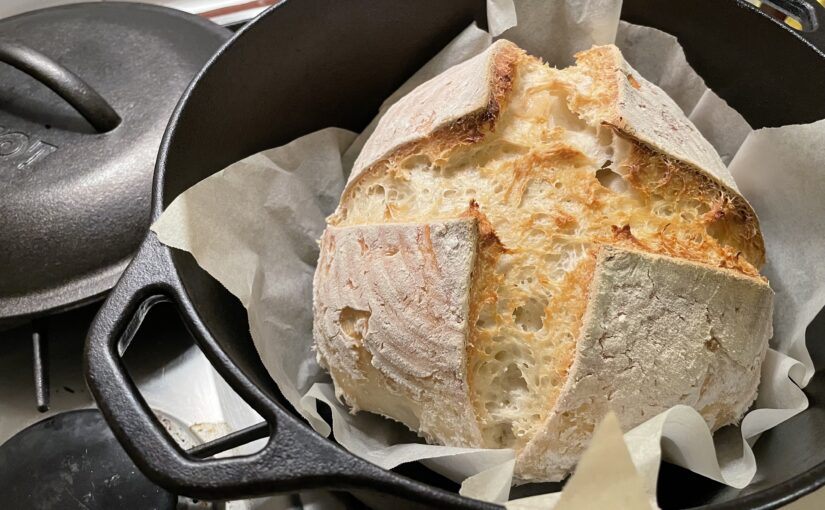
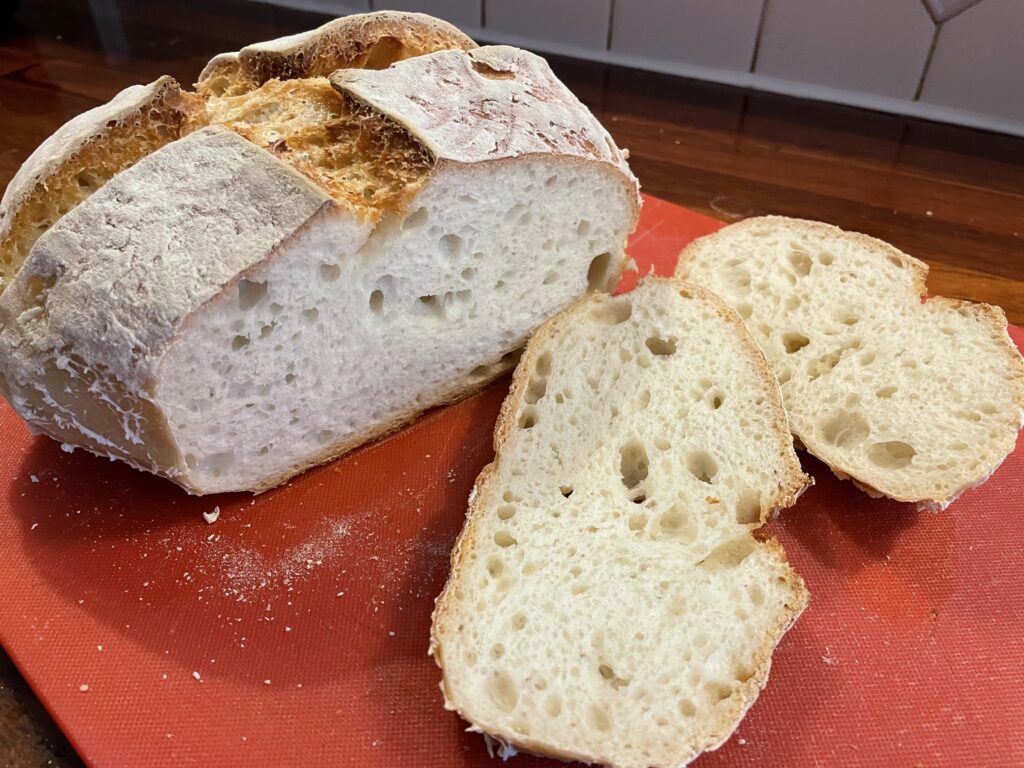
  4. With a sharp knife, slice (score) a pattern on the top of the dough. Unlike with gluten-based bread, you don’t need a special razor blade – a kitchen knife will do. Cut into the top of the dough about 1 cm as you go. You can choose from a variety of patterns. I like to either score a big X (as seen in the photos here) or score three parallel lines across the top. The chef in my sourdough class liked to do a tic-tac-toe board style pattern. Do a web search for “scoring patterns” if you want inspiration.
  5. Moving quickly, take the dutch oven out of the oven, and remove the lid. Gently lower the baking paper with the dough on top into the dutch oven, but remember the dutch oven is really hot. Replace the dutch oven’s lid and return to the oven. Reduce the temperature to 200 degrees Celcius. Bake for 20-25 mins.
  6. Take the dutch oven out of the oven, and remove the lid. Return it to the oven without the lid. Bake for another 20-25 mins.
  7. Take the dutch oven out, and let it stand for 10 mins or so before removing the bread and letting cool completely on a cooling rack. This takes a couple of hours.
  8. Often by this point it is the evening of the fourth day, so I’m not ready to eat the bread straight away. It will be breakfast on the morning of the fifth day! I like to put my bread in a paper bag, and then in a sealed plastic bag to keep it fresh.
  9. Enjoy!

Gluten-Free Sourdough Waffles

I previously described how I maintain my sourdough starter at 60g in the fridge, feeding it weekly. Since sourdough can basically triple itself in 24 hrs (or in a week in my case, since I keep it in the fridge), I need to discard 2/3rd of it each time so it maintains the same size. I also keep the discard in the fridge, in a separate jar, and it builds up at a rate of about 30g per week (with another 10g lost down the sink). What do I do with this? A popular option is to turn it into waffles!

I received a Breville “the No Mess Waffle” maker appliance as a present a few years back, before I went gluten-free, and made lots of different types of waffles. I can confidently say that this recipe makes the best plain waffle that I’ve had from the waffle maker. It has a good crispy texture and a great taste that works as a vehicle for a range of sweet toppings.

My discard jar holds about 180g of discard, so it takes around 6 weeks to fill up and that’s probably about as frequent as we’d want to make waffles. The recipe below is heavily based on this sourdough waffle recipe from Cultures for Health. Note – it does need to be started the evening before, for cooking into waffles for breakfast the following morning.

Ingredients

  • 180g of discarded sourdough starter, from the fridge
  • 140mL of water (no warmer than lukewarm)
  • 90g white rice flour
  • 45g sticky rice flour (a.k.a. glutinous rice flour or sweet rice flour)
  • 45g cornflour
  • 1/4 teaspoon (heaped) baking powder
  • 1/2 teaspoon table salt
  • 1 tablespoon (20mL) maple syrup
  • 2 teaspoons (10mL) vanilla extract
  • 2 eggs
  • 30g unsalted butter, melted
  • 1/2 teaspoon bicarb soda
  • 1 teaspoon (5mL) water – optional

Method

  1. In a sealable bowl or container, mix the discard with the water, then mix in the flours. Seal and leave on the bench overnight.
  2. In the morning, when the discard has reactivated and turned the flour mixture bubbly, put the mixture in a large bowl, and add in the remaining ingredients (excepting the bicarb soda). Stir with a fork until there are no big lumps.
  3. If the bicarb soda is very powdery, it can be evenly sprinkled over the top. If it’s a bit lumpy, dissolve it in a teaspoon of water, then tip into the mixture. Quickly stir through and leave until ready to start cooking.
  4. Set the waffle maker to 5 (or desired crispness/brownness), and when ready, pour 1/2 cup (125mL) of mixture evenly across the cooking surface. Keep cooking each waffle this way until done.

Makes 6 waffles. Serve with maple syrup, sliced fruit, berries, cream/yoghurt, or however you like them!

Surplus waffles can be frozen, separated with baking paper. They reheat well split in half and popped in the toaster!

Gluten-Free Sourdough

I was late to lockdown-driven sourdough baking. It wasn’t until Melbourne’s second lockdown, in August 2020, that I finally got on the sourdough bandwagon. However, I have kept my sourdough starter alive since then, so I’ve achieved the ten-month milestone!

Still, if I was to share my starter with someone else, or, not that I want to think about it, fell sick and someone else needed to keep it going, my sourdough regime isn’t documented anywhere yet. This post is intended to record what I’ve been doing, and it’s a little bit different to other sourdough feeding approaches that I’ve read online.

It’s not radical or anything. It just suits me and my needs in two ways. Firstly, the sourdough starter is gluten-free. Secondly, it is pretty cheap given that it gets minimal feeding – only 20g of flour each week – unless I’m baking something.

Before I describe it, I’d like to credit my main inspirations for the technique I use:

Feeding Regime

I keep my sourdough starter in the fridge, and then one morning on the weekend, I remove it and allow it to warm up. This allows the starter to get active again, and after a few hours, it will be creating bubbles.

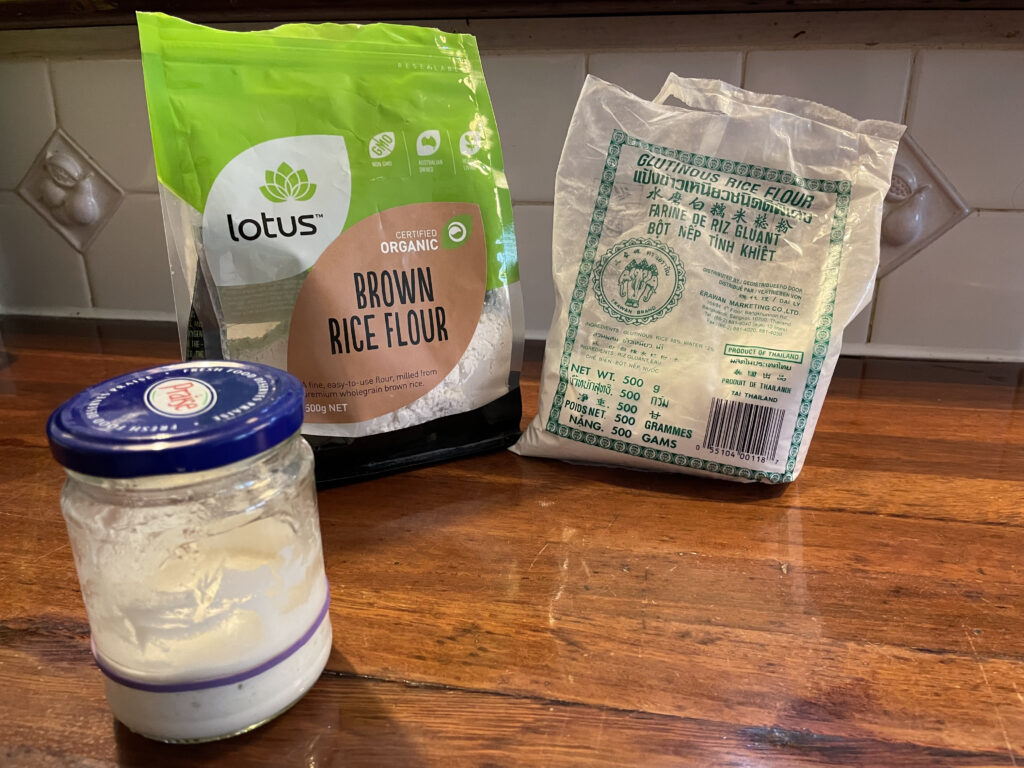
a jar with sourdough starter and in the background is a bag of brown rice flour and a bag of glutinous rice flour

As you can see here, I keep my sourdough starter in a small glass jar, and mark the fill level with a rubber band, in traditional style. In this picture, it has risen a little and looks bubbly. Note that this is basically as bubbly as it gets, unlike many pictures of other sourdough starters that you see online. However, it still seems to work perfectly fine for baking.

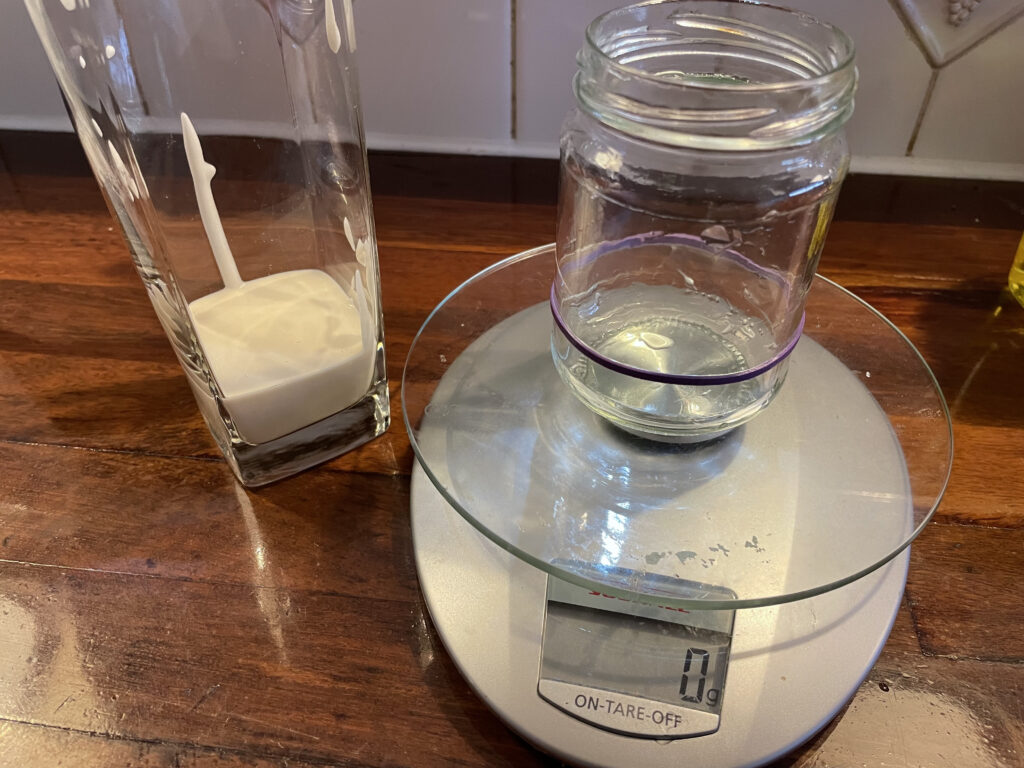
An empty glass jar on a scales with sourdough starter in a nearby glass

The first thing I do is open the glass jar and smell it. It should smell sweet and yeasty, but if it doesn’t, I throw it out and use some of my earlier discard (see below), but I’ve had to do that only once. Next, I stir it with a fork, and scrape out the glass jar into a drinking glass that is good for pouring. I then give the glass jar a good rinse and put it on the kitchen scales. The scales need to be pretty accurate, and the ones I have are accurate to about 1 gram.

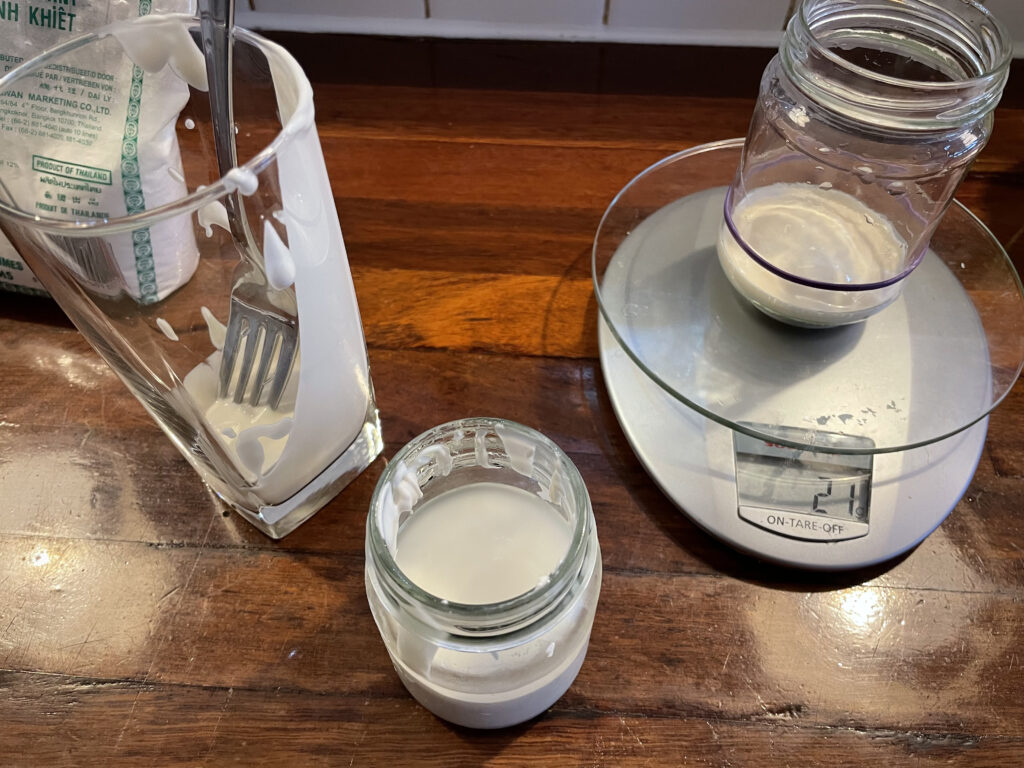
21 grams of sourdough starter measured into the glass jar with the remaining starter in a nearby glass and another glass container nearby with discard

I measure 20 grams (or close to it) of starter back into the glass jar, and scrape the rest of it into another jar that I use to keep the discard. The discard jar holds up to about 180 grams, which is a good amount for some of the recipes that I use. The discard jar is always stored in the fridge.

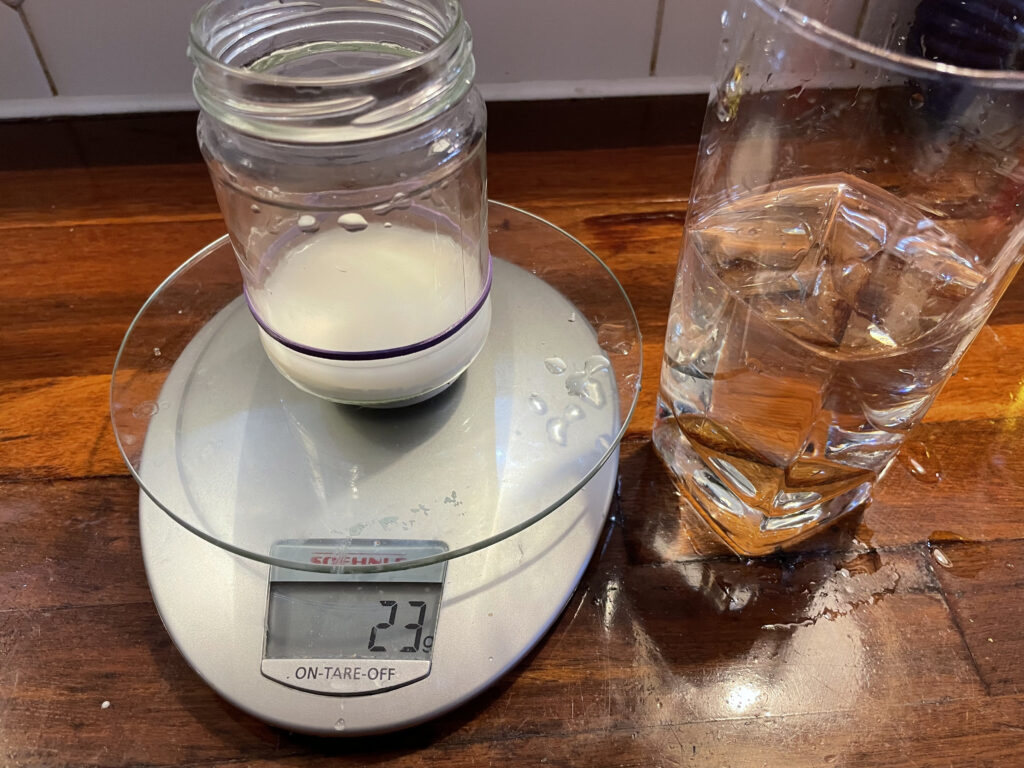
23 grams of water measured into the glass jar with the remaining water in a glass nearby

I now rinse out the drinking glass and partially fill it with lukewarm water from the tap. In Melbourne, the tap water is completely fine for sourdough. I pour about 20 grams (or a little more) of water into the glass jar, on top of the 20 grams of sourdough starter from before. Don’t tip out the rest of the water yet, though.

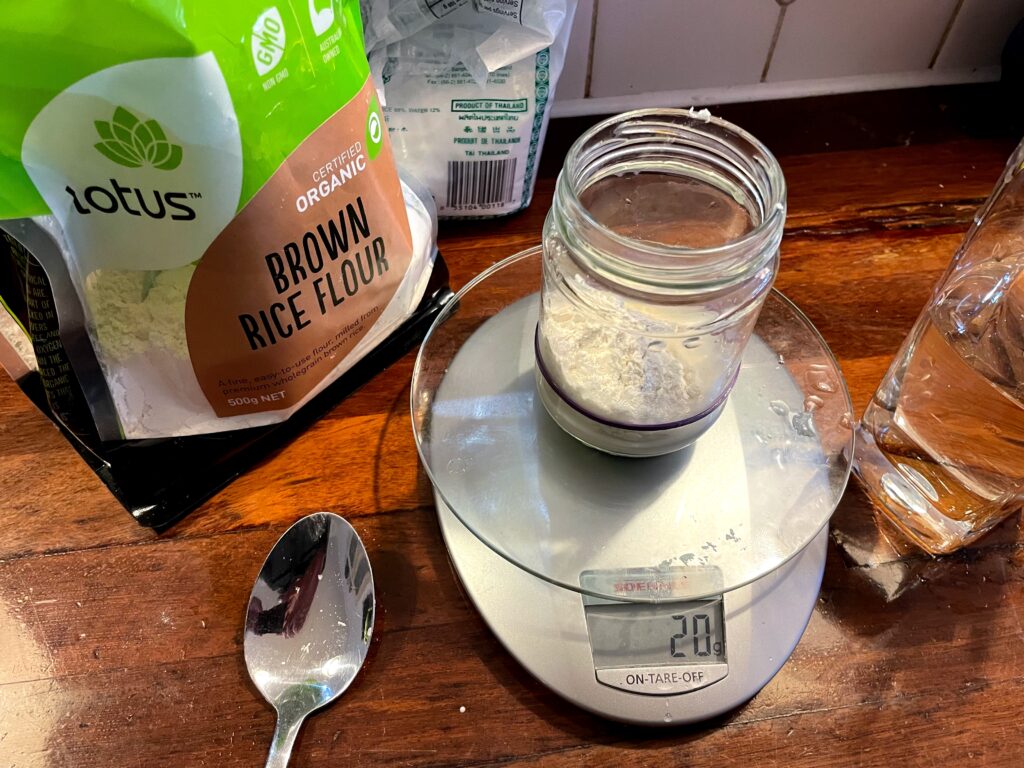
20 grams of flour measured into the glass jar with the bags of flour in the background

I now measure 20 grams of flour, which is equal parts brown rice flour and glutinous rice flour (also known as sticky rice flour or sweet rice flour). The glutinous rice flour is cheap and readily found at the supermarket. The brown rice flour is an organic brand, which helps ensure appropriate micro-organisms are being introduced.

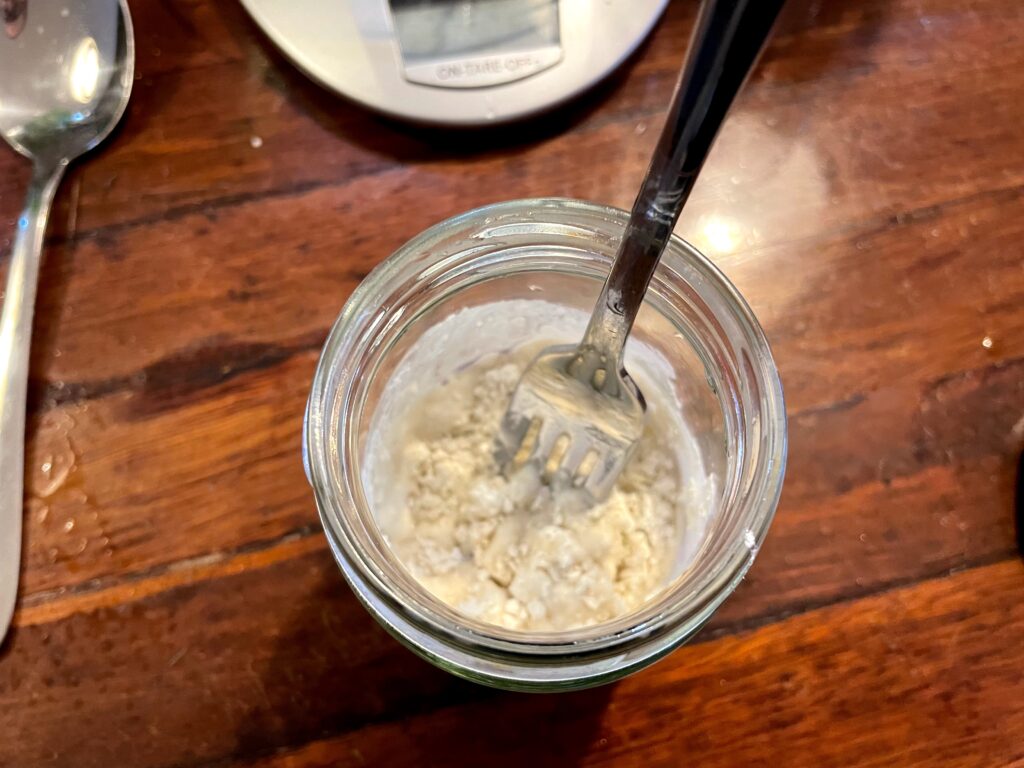
A dry, lumpy mixture in a glass jar with a fork in it

I mix it all together with a fork, and at this point, it may be too dry. If so, I spoon in a very small amount of additional water, until I can mix it into a smooth, thick paste.

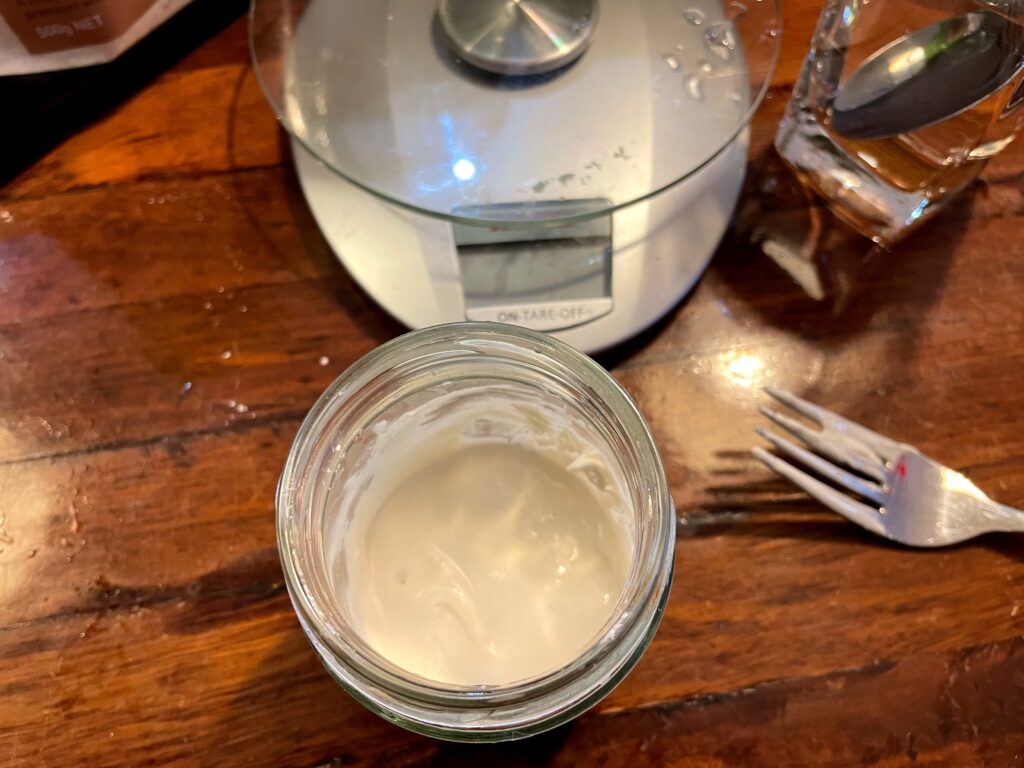
A thick and smooth mixture in a glass jar

The result should be something like thickshake consistency, but it doesn’t hurt the sourdough if it’s a bit runnier. The weights given above are for a “100% hydration” sourdough starter, which is what most sourdough recipes assume, so if the starter is runny, you’ll need to deal with that when baking. However, if you’re not baking, you can just be more careful at the next feed, and the ratio should come right.

I leave the starter in its glass jar for a few hours until very tiny bubbles are just visible, and then I pop it back in the fridge for another week.

The way I’ve described this above, it probably sounds very finicky. In practice, it takes about 5 minutes of work per week, with the rest of the time spent simply leaving a glass jar on the kitchen bench or in the fridge. All up, it’s not much effort to maintain the sourdough starter so it can be used to bake amazing things.

Baking approach

If I’m going to do some sourdough baking, there are two things to address. Firstly, sourdough that is straight from the fridge needs some time to become properly active. Secondly, most recipes seem to assume there is 150 grams of starter available. These can both be dealt with together, but it does take a couple of days.

To get up to 150 grams, I remove the starter from the fridge and follow an approach similar to a normal feed as described, but with an intent to bulk up the starter rather than maintain the size of the starter. The glass jar won’t hold 150 grams of starter, so to bulk up the starter, I need to scrape it out into a bigger container. There is about 60 grams of starter in the glass jar, but in practice, about 50 grams can be scraped out.

So, you can do 50 grams starter + 50 grams water + 50 grams flour to get to the required 150 grams. However, this doesn’t leave any starter to continue with. In theory, you can use previous discard if there’s some, but I would do this as a last resort.

Instead, I put 20 grams starter back into the glass jar and feed it as usual (and put it back into the fridge), and put 30 grams into a new container, with 30 grams water + 30 grams flour, which gets to about 90 grams. I leave this for a full day, then discard 40 grams, and add 50 grams water + 50 grams flour, to get to 150 grams. It should be fine to bake with the next day, as it will be active and the right size.

If you’ve read through all of this and want to follow this approach yourself for gluten-free sourdough starter, I hope it was clear. Please let me know how you go!

Messing around with DWeb

You may have heard something about NFTs recently. They are the technology concept that underpins the ability to sell an authoritative version of digital art, sometimes for millions of dollars. It is a bit like selling a signed print for more than the unsigned print sells for, but the unsigned print is free while the signed print is worth $69M. But that’s not really want I wanted to talk about.

If you are the sort of person who pays that much for a bunch of electrons somewhere, you don’t want to wake up tomorrow to find them gone. Many well-known websites have, at various times, been brought down by DDoS attacks or merely defacement attacks, and content has gone missing. A website is a surprisingly brittle thing, and relies on domain name registrars, nameservers, web hosts, ISPs and other parties to all come together to deliver the content that you’re expecting. Since a buyer may expect their newly acquired, expensive digital artwork to be as long-lasting as a statue or painting, traditional web infrastructure is not really the solution.

So, NFTs are now making use of decentralised Web or DWeb technology, where the content delivery has no single points of failure. A lot of the thinking behind this is motivated by free speech ideals and resisting government control, but it can just as easily be put to the service of capitalist art speculators. Or, in my case, blog authors.

I was curious to explore what was involved in putting my humble WordPress blog onto the DWeb, or as it is sometimes called, Web 3.0. It wasn’t too hard, but the material I found explaining it was a little esoteric. Follow along if you would like to do this too!

There are basically two things that I needed to do: host the content somewhere (equivalent to using a web host, or perhaps a CDN) and register a name that could point to that content (equivalent to registering and hosting a domain name). In theory, you don’t need the name, but the address for the content then will not be human-readable or memorable.

IPFS (or InterPlanetary File System) is a technology for hosting content in a decentralised fashion, a bit like peer-to-peer file sharing. The main catch is that the files are all static, which means that they can’t run a platform like WordPress. I had to begin by creating a static mirror of my website as plain HTML, CSS, JavaScript and images, without any dynamic content. If I wanted to do it properly, I’d also have replaced the backend system that allows people to leave comments, but instead that feature will simply be disabled.

At the Terminal prompt of my Mac (which suffices for a Unix shell), I used these commands in an empty directory:

% wget -k -r -p -N -E -w 0.5 -nH -e robots=off -R "*\?feed=*" -R "*\?rest_route=*" -R "*&*" https://www.aes.id.au
% git init
% git add *
% git commit -m "Initial commit"
% git remote add origin https://github.com/aesidau/www.git
% git push -u origin master

and within a couple of hours, I had a static copy of my website stored in GitHub. This is a necessary first step to make use of Fleek, which handily takes a GitHub repo and deploys it to the IPFS. It is also free to use for personal purposes if you use less than 3GB of storage!

At this stage, my blog was now available at https://ipfs.fleek.co/ipfs/Qmahm66pomdqppz71abMixDnHWr9b1HmqXhv1iTGrEWjb2/ which is a bit of a mouthful. That last part is the IPFS Hash that is used to uniquely refer to my blog content. Ideally, I could share something short like https://aes.id.au so the next step was registering a suitable name.

There are a few contenders for the name service of the DWeb, including Handshake and NameCoin, but currently the most popular one seems to be ENS which uses the Ethereum blockchain. To buy a name via ENS, you’ll need some Ether currency and a supported wallet to store it in – MetaMask, Portis, Authereum, Torus, WalletConnect and MEW are the various options at the moment. I chose the option of using the Chrome browser together with the MetaMask extension. The amount of Ether you need to buy will fluctuate based on the price of Ether and exchange rates, but it will probably be in the tens of dollars. Also, if you want to buy a name that is 3 or 4 characters long, it will be a lot more expensive. Additionally, every time there is any update to the ENS name record, it will cost some Ether.

After I’d installed MetaMask, set up a wallet with it, and put in some Ether, I needed to go to the ENS App site and click on “Connect”. Then it’s just a matter of following the instructions to register a name. Once the name is registered, click on the option to manage the name, and click on the option to edit the record. I also updated the entries for ETH and BCN addresses, since the changes will all be covered by the same fee, but the main one to edit is “Content”. I put “ipfs://Qmahm…” here with the full IPFS hash, and saved the record.

That’s it. So, now I can refer to that static mirror of my blog by ipns://aesid.eth (in the Brave browser) or aesid.eth/ (in the Chrome browser with MetaMask installed) or https://aesid.eth.link (which uses an IPFS gateway and should work in every browser). Unfortunately, while it is now protected against my WordPress blog disappearing, it is already out-of-date, as this blog post isn’t there!

Working without the commute

This post originally appeared over on Medium.com

The regular way of (white-collar / office) working in the coming years will be quite different to that of the last decade, but also quite different to how most people are predicting.

This is going to be one of those articles where the author talks about what may happen in the future, after some of the Covid-19-related restrictions ease. Why add to the steaming pile? In my case, I want to put forward a view that is different from most of what I am seeing, and also because it is good to have documentation of a prediction so that it can be tested in the future for how well it tracked to reality.

The majority of articles I’ve read about future ways of working seem to predict that the future will be like the present. Principally, that we are currently working from home and that this will continue. Bloomberg reports that Google has seen the equivalent of $1b a year in savings from not having people working and travelling between offices. Additionally, around two thirds of employees in US companies would rather work from home than get a $30,000 raise. So, it seems there are benefits to both employers and employees in letting the current situation continue.

I’ve noticed that in my own experience, there has been a significant productivity improvement in working remotely. Firstly, I work longer, as some of the time I would have spent commuting is spent working instead. Secondly, unproductive time at work spent in travelling between meeting rooms, and waiting for meeting rooms to be vacated, has been eliminated when using online meetings. Lastly, I am able to multi-task more effectively during remote meetings, as I can triage and process emails in a way that would have been more difficult to do in person. So, even putting costs like property rental, cleaning and energy for lighting/heating/cooling aside, I expect many employers will experience a productivity hit if all their workers return to the office full-time.

However, these benefits to employers exist regardless of where the remote employee is working from. Significantly, many employees do not have ideal conditions at their homes to work remotely. For example, if there are multiple people trying to work remotely from the one dwelling and there aren’t enough working spaces to share. Or if the dwelling is too small to have a working space that is ergonomically set up for healthy long-term working — I have seen some people working from small bedrooms. However, the reason such people are still working from home is largely due to restrictions relating to Covid-19, and as these restrictions ease, it’s fair to ask, where would they prefer to work?

The answer seems to be that they’d prefer to work somewhere without a commute. Even before Covid-19, research showed that people hate commuting. One study referenced by Forbes back in 2016 equated removal of a commute with a $40,000 raise, which is an interesting correlation with the work-from-home survey result above.

Additionally, people do value and benefit from the social interaction that they receive in a workspace. This is often at odds with remote working, where online social interaction may need to be a scheduled activity rather than happening informally as part of bumping into people in corridors or kitchens. Meals are a traditional social occasion, but food and drink can’t be readily shared over a video call.

If you put together the value of remote working, the desire for a minimal commute, and the social benefits from working alongside other people, the natural conclusion is that we will see a surge in interest in co-working spaces near people’s homes, once Covid-19 backs off. In Australia at least, many of the co-working spaces have been in the same geographical areas that major corporate offices have been, as the proposition has been in providing flexible offices near to corporates. However, we can expect the proposition to shift to providing flexible offices near to employees.

While co-working businesses have taken a big hit during the Covid-19 lockdowns, up until 2020 there had been a strong trend of growth in adoption of co-working spaces. A March 2020 study by Coworking Resources showed 17% growth in number of users and number of spaces over the previous two years.

Additionally, there are spaces that are similar to co-working spaces that will likely support this demand. Many local libraries supply internet connectivity and bookable desks. Similarly, some cafes are also happy for locals to work from their premises and use their Wi-Fi if they are buying food and drink. In a world where remote working is normalised, arrangements like these might be made more official.

Of course, such spaces do not offer a free alternative to employers providing offices. The costs will need to be borne by someone. Perhaps reduced commuting costs (vehicles, fuel, parking, tickets, etc.) and home costs (energy, internet, etc.) could offer some compensation to employees. Perhaps employers will see the cost savings and productivity gain compared to offices and also provide financial support, or even get into the co-working space business themselves.

There are also questions about how to maintain business confidentiality in a space where there may be employees from competing organisations also working there. Co-working space designs can help mitigate this, as well as suitable IT solutions, but it will remain a risk to be managed. It is not dissimilar to working from an airport lounge or having work discussions in a taxi or cafe, so shouldn’t be considered a new risk.

I hope that we will see more forecasts about the future ways of working that go beyond working from home or even hybrid working. While many people and businesses want to retain the benefits of remote working, working from home is not going to be the only solution. Shared working spaces, close to people’s homes, will almost certainly be part of it.

Book Review – Songlines

When I was in Canberra recently, I went to what I feel must have been the prototypical Canberra bookshop. It was a cafe, and it was also a bookshop that seemed to specialise in books on topics that related to a current political theme. While waiting for my coffee, I spied this book, and since it seemed to build upon material I previously read about in The Biggest Estate on Earth or Dark Emu, I was keen to learn more. I wasn’t disappointed.

Songlines: The Power and Promise, co-written by Margo Neale and Lynne Kelly, initially seemed to be an explanation of what the indigenous Australians call Songlines, i.e. the stories that follow a track across part of the Australian geography. It was this, but it was actually a lot more.

The book mentions that Songlines is a relatively new term, having been coined in 1987. However, and while there are other terms floating around, it seems to have recently become more accepted as the main word to use to refer to these geographically-linked stories from the indigenous Australian societies. This goes some way to explain why I never learned about them in school, but I hope students of today learn about them as they are fascinating!

The book goes further, and highlights how Songlines are the local example of practices from societies all over the world with a strong oral tradition and who don’t use written language for recording and sharing their laws, morals and facts about the world. It completely changed how I think about creative arts, as in such societies, the use of singing, painting, story telling and dancing are not a separate domain for entertainment but the key means for the society to pass on these laws, morals and facts through history. Songlines prove that this mechanism is sufficient to accurately pass on such information over a stretch of 10,000s years while still be flexible enough to adapt to changes and accumulate new knowledge. In a sense, what we call creative arts in Western Culture are a sort of vestigal organ from earlier knowledge systems. Mind blown.

One part of all this that may be familiar is the use of a memory palace or “method of loci”, where facts are given a longevity boost in memory by tying them to imagination about a physical place. For example, imagining walking through rooms of your house, where each of a series of facts is turned into a memorable image located in each room. In the songlines context, rather than rooms of a house, these are notable geological or astrological points of interest throughout a landscape. In addition, songs with lyrics are more memorable than raw facts, so the same journey represented in song will reinforce the memory palace. There are many more tools in the songlines toolkit that ensure facts are retained and can be easily passed along.

Within the book, there is also a push for the adoption of this mechanism alongside what we’d consider modern mechanisms for recording and sharing knowledge (such as books, TV and the Internet) to form what they call a “third archive” of human knowledge. Certainly, we seem to have lost value and respect for memorising facts given how easily they can be retrieved via digital devices, but this has probably created a vulnerability or fragility in our systems, as it is hard to now imagine life without these devices. In any case, this is the first of a series of books relating to Australia’s indigenous peoples, and if they are all this good, I’m looking forward to reading more.

Rating: 4.5 stars.

Can we talk about the back button?

I am one of those people who is not loyal to a particular smartphone platform. There are some people who say this, but truly, I switch between having an iOS based phone and an Android based phone every couple of years. I feel it is my professional obligation to ensure I am aware of the trends relating to smartphones in general, and so I switch.

I have recently switched to using the iPhone 12 Mini after using Android devices for the last couple of years. I love that Apple has added a smaller phone again to their current range, as I like to be able to fully use a phone one-handed as I walk along. It is great that this phone supports 5G. Unfortunately, I am also deeply missing having a back button on the device.

It is a little bizarre to me that I need to explain this, as I’ve come to realise that some people who have exclusively used Apple iOS devices for their entire lives don’t even realise that Android devices have a back button. This is an on-screen, virtual button (it used to be a physical button) that you can tap to take you to the previous screen you were on, and can keep tapping it until you get back to the home screen. It is conceptually the same as the back button in a web browser. Now, I am aware that some recent Android devices have started to do away with the back button also, but I am choosing to believe that this is just a short-lived fad.

The Android back button is just a simple user interface element, that it is only when it goes missing do I realise how much navigational heavy-lifting it provides. At any point, in any app, you know exactly where to tap to exit the screen you’ve ended up in. There is no need to figure it out based on visual cues that an app might choose to show. Just like in a word processor (or really any application that allows you to create things), you know you can always Undo, and it’s always the same mechanism. There’s not a different way to Undo a typo compared with an accidental deletion or a formatting glitch.

On the iPhone, the way to leave a given screen is up to the app and can be quite inconsistent. The emerging approach is to use the left-to-right swipe gesture, which is quite elegant, although there is no visual indicator that this will work so you need to be told about it, and also be prepared for it not to work at all. It would be great if it simply worked all the time, the way the Android back button does. So, this post is also a little bit of a plea for something like that to happen.

I suspect that people who are regular Android users don’t need to be convinced, so my audience is more iPhone users who don’t realise how inelegant the user experience is. Hence the rest of this post will be actual examples showing what I’m talking about using screenshots from my current iPhone device.

a screenshot of the Messages app on the iPhone

Above is a screen within the Messages app. It has a place on the screen in the top left corner with a “<” symbol so that we know that we can go back to the previous screen in the app by tapping this. We can also do a left-to-right swipe to achieve the same thing. So far, so good.

However, say we arrived at the Messages app by searching for the app rather than tapping on its icon in the home screen…

a screenshot of the Messages app on the iPhone

In this case, there is now also a little label “◀ Search”, that, if we tap on, takes us back to the search box. Tapping the “<” takes us to a different screen in the Messages app, and so does left-to-right swipe. So, it’s a little bit messier, but at least there’s a convention that the “going back” options are in the top-left corner, and left-to-right swipe does the same as “<“. Or maybe not.

a screenshot of the Photos app on the iPhone

This is a screen within the Photos app, displaying a cute pic of my parents’ dog. There is a “<” in the top-left corner to take us back to the photo Library within Photos. However, doing a left-to-right swipe doesn’t do the same thing. Instead, it scrolls to the photos immediately to the left of the displayed photo. So, the swipe gesture isn’t reliable, but is the position of the “going back” option in the top-left of the screen reliable?

a screenshot of the Safari app on the iPhone

Well, this screenshot is from the Safari app, where the “<” symbol is shown at the bottom-left. Although, this little bar of symbols disappears as we scroll through a page, and is shown only when we then scroll up. However, in this case the left-to-right swipe does perform the same action.

Now, tapping on the rightmost icon to show the open tabs…

a screenshot of the Safari app on the iPhone

This takes us to a visual display of the open tabs, but to exit this and return to the previous browser screen, we need to tap “Done” in the bottom-right corner. Additionally, left-to-right swipe doesn’t navigate us anywhere, and risks closing one of the open tabs if we’re not careful. We’ve now found exit prompts in three out of the four corners, but can we find an example of it in the top-right corner? Why, yes.

a screenshot of the App Store app on the iPhone

This is a screenshot from within the App Store app. If you are on the Search screen, and have searched for something of interest, but then change your mind, the only way to navigate back to the main Search screen is to tap “Cancel” in the top-right corner. Left-to-right swipe doesn’t do it either, unfortunately.

There are other examples we could look at where there is instead an “X” symbol or the word “Done” in the top-left corner, and the left-to-right swipe doesn’t work in these cases either. I hope you’ve gotten the idea.

There is no consistency around which corner the “no, I want to stop and go back to where I was before” symbol or word appears, or even what the symbol or word should be. Sometimes the left-to-right swipe works, sometimes it doesn’t, and sometimes it could scroll within the content or even delete it. There is actually an alternative that provides a single, consistent mechanism, and it’s called a back button.

Long ago, in 1987, Apple introduced something called HyperCard, which was software for the Apple Mac computers of the time. HyperCard was a huge thing and has influenced many aspects of computing we still use today, including web browsers. Instead of screens or pages, HyperCard displayed “cards”, and the cards were arranged into what it called “stacks” (although we would call them apps or web sites). Most relevant to our discussion, looking at the HyperCard user manual from 1987, there is this interesting snippet on page 5:

You can always go back: Another way to see the previous card is to press the Tilde key. Stacks in HyperCard often link to each other (a concept you’ll learn more about later). While the left arrow brings you to previous card in the stack you’re looking at, the Tilde key brings you to the last card you saw, no matter what stack it was in.

So, yes, Apple pioneered the concept of a back button. It is time to bring it back.

Diversification is the silver bullet

This post originally appeared over on Medium.

So, they say there are no silver bullets, but for dealing with uncertainty, diversification is as close as you can get. Instead of betting that the future will turn out one way, spread your bets across a diverse portfolio of likely possibilities.

I haven’t buried the lede, so there is going to be no surprise twist here, but I wanted to tease this out to show how widely applicable this concept is.

Company boards are made up of directors that need to make decisions about the future of the company. No-one knows the future for certain, so the background and experience of the decision-makers is critical for how good their decisions are. Instead of having every decision-maker with the same background and experience, having a spread of backgrounds and experiences improves the quality of the board. There are several pieces of research showing this, but one example reported in Forbes shows that, compared with individuals, a gender-diverse team makes better decisions 73% of the time, and teams that also have age and geographic diversity are better 87% of the time.

There is a danger that this seems completely obvious. Let’s just pause for a little and consider that it’s actually a little counter-intuitive. There is a proverb that has been around since the 16th century that too many cooks spoil the broth. Certainly, for a complicated task, an individual with deep expertise can often accomplish it better than a team. In fact, to underline that point, the same study reported in Forbes from before noted that diverse teams are more likely to struggle to put their decisions into action.

The difference is between complicated and uncertain. A complicated task can be made easier through the application of appropriate tools, skills and experience. Applying these things to an uncertain task doesn’t make it less uncertain. Producing a 7 day weather forecast is complicated. Getting it completely correct is uncertain.

This same logic applies in the world of venture capital. A VC firm will raise a fund to invest in a portfolio of startups, rather than just one. However, the same VC firm will typically seek out startups that each aim to win in a single market or technology area. Knowing which startup will become a unicorn is uncertain, so is best approached in a portfolio fashion. A VC fund of $50M could include something like a dozen startups, and there’s a well-known rule of thumb that only a third of startup investments will return more than their initial investment. (On the other hand, executing a startup is a complicated endeavour, and it benefits from simplifying and focussing where possible.)

Sometimes a VC firm develops an investment thesis for their fund, such as where they believe a particular technology or market should be the focus for their investments. Here’s a collection of over a dozen different VC investment theses, but a stark example is when Kleiner Perkins announced in 2008 that they would form a fund to invest in iPhone (and later iPad) app companiesdue to their belief in the potential of Apple’s iPhone. However, such VC firms still consider the winners in that space to be uncertain, and hence diversify their investments across multiple possible winners, e.g. Kleiner Perkins ended up investing in 25 companies. Similarly, investors in such a focussed fund (known as limited partners) are likely to diversify their investments across multiple VC funds, in order to mitigate the uncertainty that a particular investment thesis is wrong. An example here is Yale’s endowment fund, which historically invested in funds across VCs such as Andreessen Horowitz, Benchmark and Greylock Partners.

When it comes to corporate innovation, the lessons are the same. A particular corporate should take a portfolio approach to emerging opportunities. There might be some hypotheses that a corporation has developed about the opportunity sizes in particular markets, products or technologies. However, no one knows for sure how the future will turn out, so spreading risk across multiple opportunities is prudent.

The recent book from Geoffrey Moore called Zone to Win argues that a company can incubate only one major new business at a time, or risk spreading executive attention and corporate resources too thin. While there are examples of large companies like Amazon, Baidu, Apple, Google and Microsoft who are able to incubate multiple such initiatives at once, there are few companies at this scale.

However, when the expenditure and resources required to progress a new initiative are relatively small, and the likelihood of success of such an initiative is still very uncertain, it makes a lot of sense to spread the company’s investment across a number of these initiatives. Diversification may involve a range of possible time horizons, market segments, product areas, or technology domains. Spread the risk to increase the chance of overall success.

Whether it is the uncertainty relating to having relevant experience for board-level decisions, knowing which startups will hit home runs, or picking the right opportunities to explore within a corporate innovation function, the silver bullet is the same. Diversify across a variety of good options.

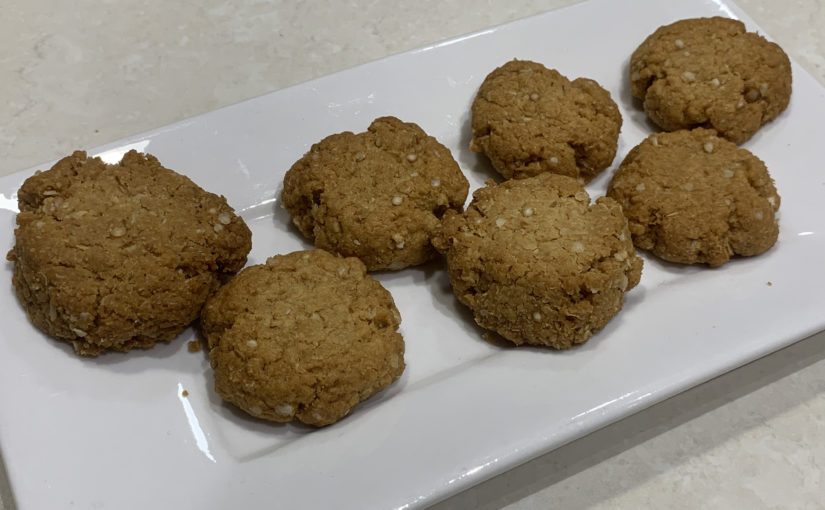
Gluten-free Anzac Biscuit Recipe

The Australian government’s Department of Veteran’s Affairs has strict guidelines on what can be labelled with the term Anzac. Part of this requires that Anzac biscuits do not significantly vary from one of the traditional Anzac biscuit recipes. Although, it has been reported that “substitution of ingredients for people who are glucose or lactose intolerant” is permitted. Given all that, I think this qualifies as a legitimate Anzac Biscuit recipe, as it only varies from one of the traditional recipes to accommodate a need to be “gluten free”. In Australia, a gluten free diet is understood to also mean oat free, so both the traditional wheat-based flour and rolled oats ingredients need to be substituted.

This recipe is largely based on one from the Coelic Australia cookbook (4th Edition), but I’ve tweaked it after making it a few times. I love to eat Anzac biscuits, so with yesterday being Anzac Day, I’d ensured that I had a good supply to eat with a cup of tea!

Ingredients

  • 1 cup (100g) quinoa flakes
  • 1 cup (150g) gluten-free plain flour
  • 1 cup desiccated coconut
  • 125g unsalted butter
  • 2 tablespoons (40mL) boiling water
  • 1 teaspoon (5mL) bicarb soda
  • 2 tablespoons (40mL) golden syrup
  • 1 cup caster sugar

Method

  1. Heat the oven to 160 degrees Celcius, and prepare a couple of baking trays, covered with non-stick baking paper.
  2. Taste a couple of the quinoa flakes to see if they are bitter. (I was using Chef’s Choice brand, which were nice but had a slight bitter aftertaste.) If so, you’ll need to dry roast them in a non-stick saucepan over medium heat for up to 10 minutes until they have turned lightly golden, and the bitterness is gone.
  3. In a large mixing bowl, combine the quinoa flakes with the flour and coconut.
  4. Put the kettle on to boil, as you’ll need it shortly.
  5. Place the butter in a medium-sized saucepan over medium heat until it has just melted.
  6. Measure the bicarb soda into a heat-proof cup, then add the boiling water, stirring to dissolve the bicarb and set aside.
  7. Go back to the saucepan, and add the golden syrup and sugar to the butter. Stir constantly until the sugar is dissolved, and the mixture becomes like a thick sauce, but don’t let the mixture boil.
  8. Remove the saucepan from the heat, and pour the bicarb and water into the saucepan. Stir it quickly, and it will froth up. Pour it onto the dry ingredients in the mixing bowl, and combine thoroughly.
  9. Form the mixture into balls, about the diameter of a 20c piece, and place on the baking trays. Flatten slightly with a finger or spoon.
  10. Bake biscuits in oven for about 10 minutes or until golden.
  11. Remove biscuits from oven and allow to cool on the tray for a couple of minutes before removing to a cooling rack to allow to fully cool.
  12. Consume with a cup of tea.

Makes 24 – 30 biscuits.

Patience is a virtue

This post is essentially a reposting of an article that I published on Medium a couple of months ago. I am giving the Medium platform a go, for topics that are more aligned with my professional life, but I don’t want to risk that the content disappears if Medium disappears. So, I’ll likely repost everything here a little afterwards.

I was speaking to an industry colleague in the innovation space, and commented to them that in corporate innovation, it was important to have patience. They blinked and restated what they thought I meant, that it was important to be tenacious. This revealed a surprising fact for me: that it wasn’t universally understood that patience is a virtue.

In the world of innovation, startups are often revered. The innovation that has come out of the international system of VC-backed tech startups is unarguable. Accordingly, in the land of corporate innovation in particular, it makes sense to seek to learn from the startup ecosystem, and apply their proven approaches into a corporate setting. Tools like design thinkinglean canvas, and the daily stand-up are examples of this.

However, innovation in a corporate environment requires a different approach to innovation in a startup, and not all of the startup lessons translate directly. Mark Searle from UC Berkley has recently made some insightful comments about that. I will add another — that the startup lesson about the the virtue of tenacity doesn’t translate directly either.

Before I go on, I’ll share some quick definitions so we’re all on the same page. Tenacity is the unwillingness to give up, even in the face of defeat. Patience is the acceptance that true success will take a while.

In my experience, it is the latter that better supports a culture of innovation within a corporate environment. That said, good innovators are not complacent, they do not accept the status quo, and they are driven to create a better world.

The reason that patience is a virtue in corporate innovation is due to corporate efficiency. Corporates are often set up so that the same idea isn’t funded in multiple places. In fact, there is usually a natural place for a particular idea to be explored, whether it’s in the IT group, marketing, or product development. If an idea fails, and most ideas do fail, it is unlikely that the same place will fund a similar idea again immediately. Effectively, a failed idea becomes taboo for a period of time.

How does this relate to patience? Well, getting the timing of an idea right is often a key part of success. However, since having an idea “too late” is a terrible outcome, people naturally err on the side of being “too early”. When a too-early idea fails, a successful corporate innovator will take the lessons from the failure, wait until the conditions are right, and then resurrect the idea. This time, the timing is likely to be better and the execution better informed. It requires an acceptance that true success can take a while, and often doesn’t come the first time.

Tenacity can be poisonous in this environment, with the unfortunate innovator continuing to push an idea within a company even after it has failed and become taboo. The reputation of both the idea and innovator can be harmed, and neither may end up working at the company in the future, depriving the company of real value.

However, in the startup ecosystem, tenacity is valued by the VCs who back startups run by tenacious people. A VC fund doesn’t live or die by the performance of a single startup, but VCs maximise their chances through knowing a startup will keep trying to find product-market fit while they keep funding it. They can then shift follow-on funding rounds towards startups that are performing better, and let the other startups run out of cash.

Many successful people from the startup ecosystem make their way into corporate innovation. They won’t have seen much patience within a startup; startups are all about urgency. Perhaps when they see patience, they associate it with lack of drive. However, corporate innovators have as much drive as innovators anywhere, and if one idea is paused, they will be progressing one of several other ideas. Corporate innovators often have many irons in the fire.

If you’re coming from a startup world into the corporate one, try to practice your patience. Sometimes the best strategy for helping an idea work out in the long term is to put it on ice for a while. When you thaw it out later, you may be surprised at how important your patience was for its success.