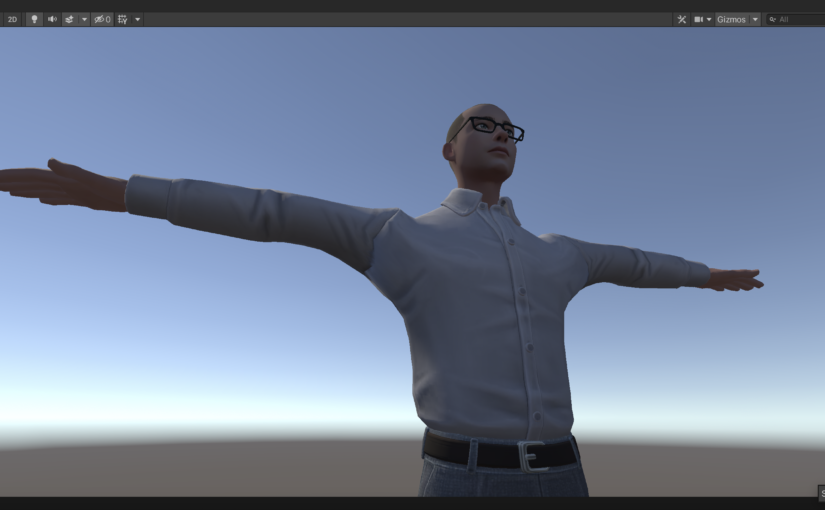
When I went looking to create an avatar, I discovered that there were a lot of options. There are 2D avatars that look like animated illustrations and 3D avatars that look like video game characters. There are full-body avatars, and half-body avatars (the top half, if you’re wondering). There are avatars tied to a particular app or service, and avatars that use an interoperable standard. There are many standards.
I decided that I wanted a full-body 3D avatar, since this seems to be the way things are headed. If I was using a Windows PC, I would be able to use something like Animaze and have my avatar track to my gestures and expressions. However, I am currently using a Mac and there are fewer options, especially in English. I was able to find the browser-based FaceVTuber service and the application 3tene, though. 3tene requires avatars in the VRM standard, so that made my decision for me.
The easiest way to create a VRM avatar seems to be to use VRoid Studio application, although the resulting avatars look like anime characters. I wanted to create a more realistic looking 3D avatar, and a service like ReadyPlayer.Me would be perfect, as it quickly creates an avatar based on a photo. The catch is that ReadyPlayer.Me does not yet export a VRM file version of their avatars. But there is a way to do it, if you’re willing to jump through some hoops.
This is a guide that I’ve put together based on trial and error, and heavily inspired by ReadyPlayer.Me’s instructions on exporting to a GLB file for Unity and Mada Craiz’s video on converting a ReadyPlayer.Me GLB file into a VRM file.
Firstly, you will need to have downloaded Blender and Unity / Unity Hub. For Unity, you will probably need to also set up an account. This guide was based on using Blender v3.2.1 and Unity 2020.3.39f1 Intel.
You will also need to download the UniVRM package for Unity. I used v0.103.2, which was the latest version at the time. Make sure you download the file named something like UniVRM-0.xxx.x_xxx.unitypackage. You don’t need the other files.
How to create a VRM file from a Ready Player Me avatar
- Create a folder that you’re going to store all the avatar assets in, let’s call it
vrm_assets. - Create an account on ReadyPlayer.Me, and build an avatar for yourself. It’s pretty fun.
- Click on “My Avatars”. You may need to click on Enter Hub to see this menu option.
- Click on the 3-dots icon on your avatar, and select “Download avatar .glb”, and store it in
vrm_assets(or whatever you called that folder before).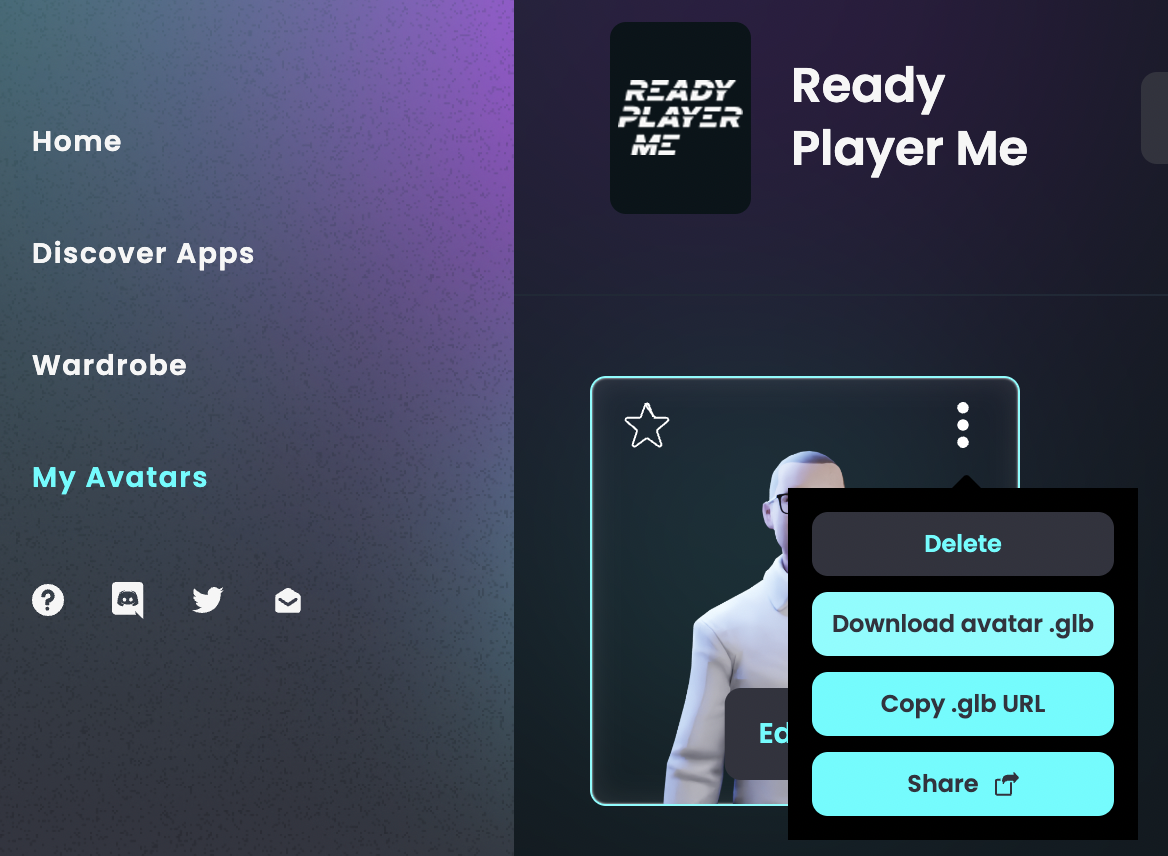
- Open Blender, and start a New File of the General type.
- In the Scene Collection menu, right-click the Collection and choose Delete Hierarchy, to get rid of everything in the scene.
- Then select File > Import > glTF 2.0 (.glb/.gltf) menu option, pick the avatar GLB file that you downloaded from ReadyPlayer.Me and stored in
vrm_assets, and click “Import glTF 2.0”. - If you’re worried that all of the colours and textures are missing, you can get them to appear by pressing “Z” and selecting Material preview, but you can skip this step.
- Select the Texture Paint on the top menu bar to enter the Texture Paint workspace.
- Change the “Paint” mode to the “View” mode in the menu in the top left of the Texture Paint workspace screen.
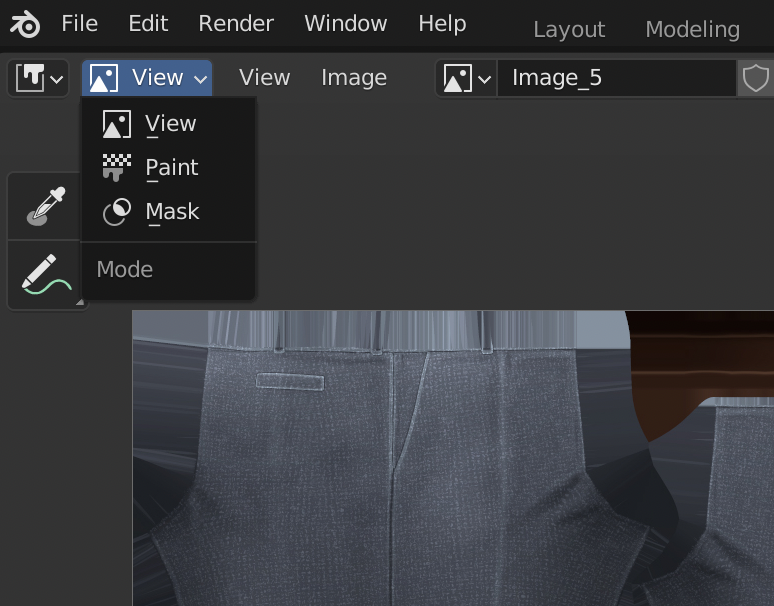
- Then use the texture drop-down in the menu bar at the top to select each Image_0, Image_1, texture etc. in turn.
- For each texture, select the Image > Save As menu option to save as individual images in your
vrm_assetsfolder. Some of the textures could be JPG files while others are PNG files. Don’t worry about that. Just make sure you save all the images, but you can ignore “Viewer Node” or “Render Result”. - Now select File > Export > FBX (.fbx) and before you save, change the “Path Mode” to “Copy” and click on the button next to it to “Embed Textures”. Then click the “Export FBX” button to save it into
vrm_assetsas well.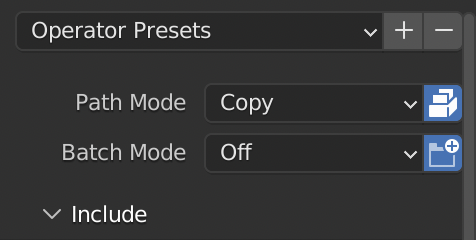
- Close down Blender, and open up Unity Hub.
- Create a New Project, and select an Editor Version that begins 2020.3 and using the 3D Core template. Give the project a name that works for you, but I will use “VRM init”. Click “Create project”.
- Wait a little while for it to start up, then a blank project will appear. The first thing to do is bring in the UniVRM unitypackage file, so drag that from the file system into the Assets window. You will be shown an import window, with everything selected. Just click Import to bring it all in. After it’s done, UniGLTF, VRM and VRMShaders will be added to the Assets window.
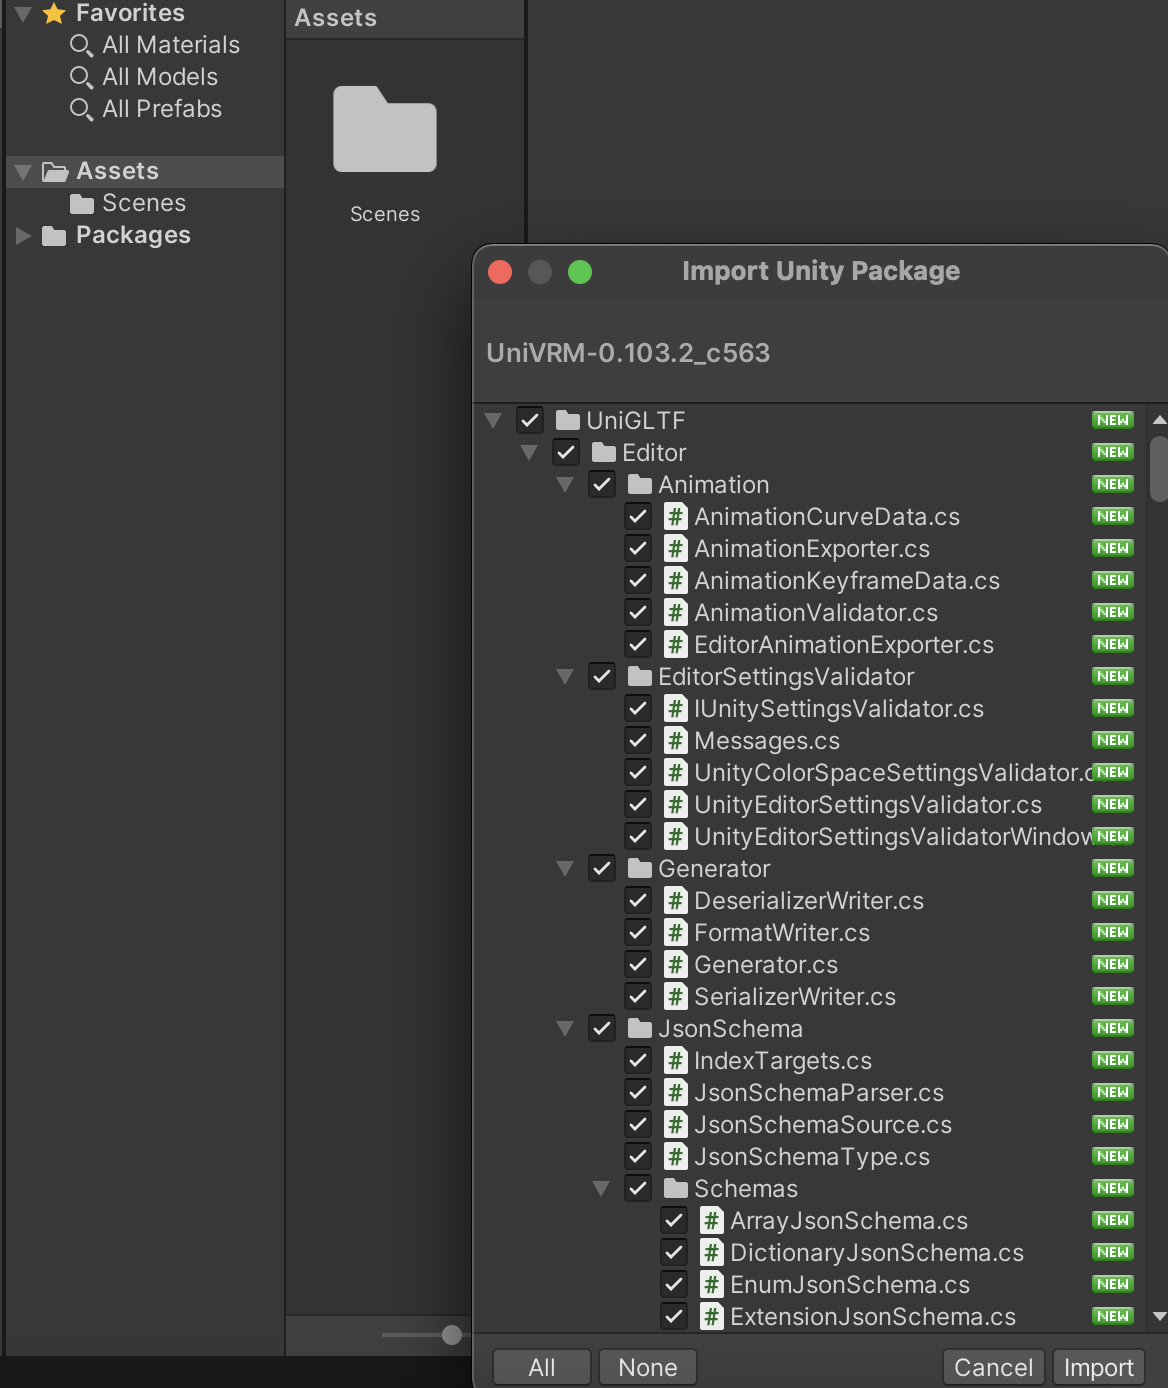
- Create a new folder in the Assets window called Materials. Open the Materials folder, then drag all the texture files from
vrm_assetsover into it.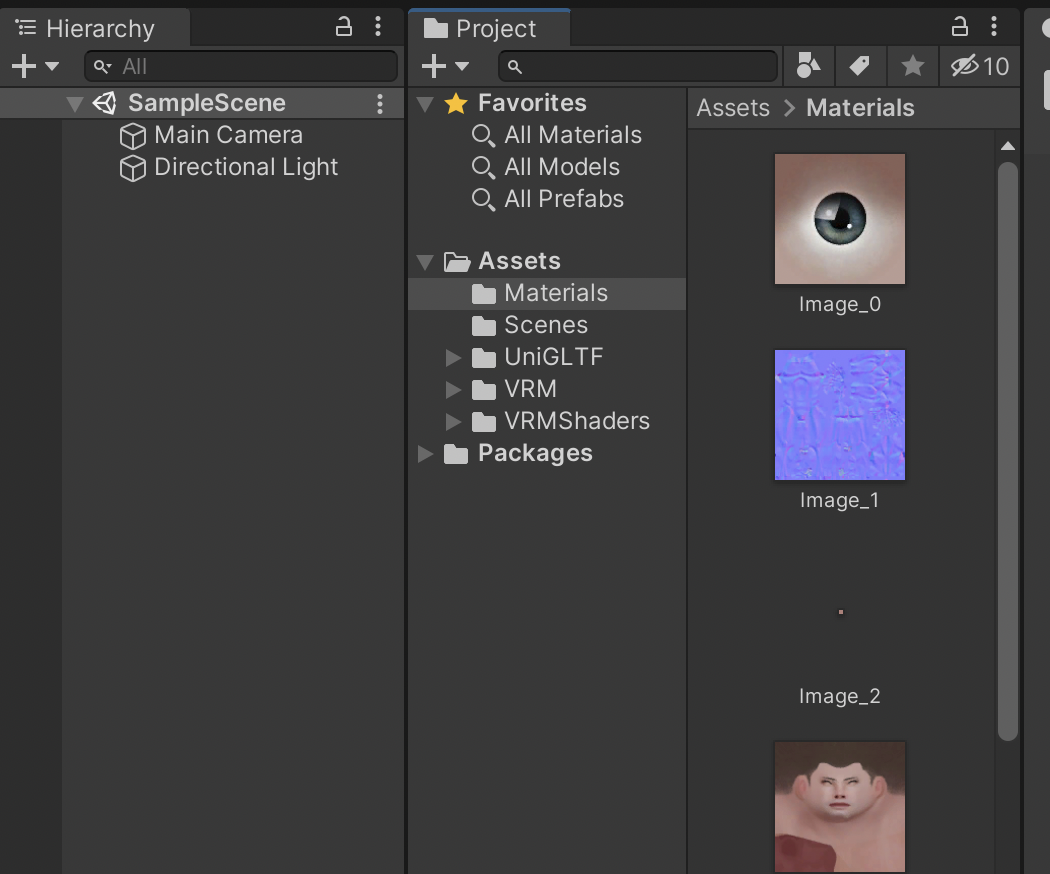
- Go back out of the Materials folder to the top level of Assets, and drag the FBX file that you exported from Blender into the same Assets window. The model will appear there after a little while.
- If at any point you get an error message like “A Material is using the texture as a normal map”, just click “Fix now”.
- Click on the model, then in the Inspector window, click on Rig. Choose Animation Type to be “Humanoid”. Click Apply.
- Staying in the Inspector window, click on Materials. Choose Material Creation Mode to be “Standard (Legacy)”, choose Location to be “Use External Materials (Legacy)”, and leave the other options at their defaults (Naming as “By Base Texture Name” and Search as “Recursive-Up”). Click Apply.
- Drag the model from Assets into the Scene.
- If your model is meant to look like an anime figure, do this step, but otherwise (e.g. for more realistic avatars) skip it. Expand the newly created avatar in the Hierarchy window, and for each Material listed (which should be everything but Armature), click on it, then scroll down in the Inspector to the Shader. Click on the Shader drop-down (it may say something like “Standard”) and change it to VRM > MToon. Do this for all the materials in the model.
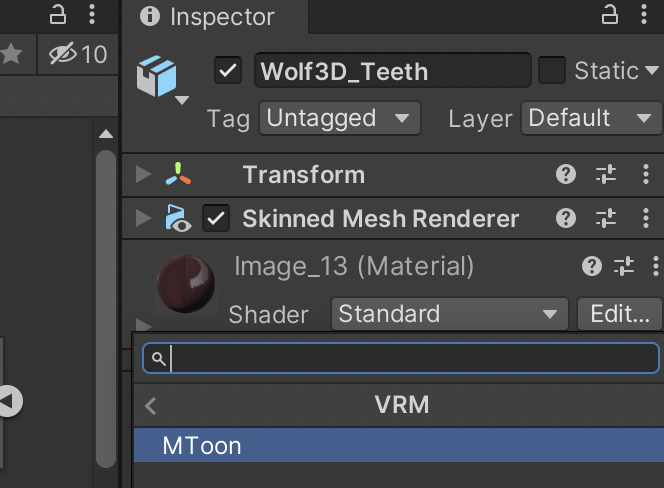
- Alternatively, you can do other tweaks to the materials at this point. I find Unity makes the textures look a little grey, so this can be corrected by going into each Material as described in the previous step, opening up the Shader and changing the colour next to Albedo to use Hexadecimal FFFFFF (instead of CCCCCC). This is completely optional though.
- Click on the avatar in the Hierarchy window, and then in the VRM0 top-level menu of Unity, select Export to VRM 0.x resulting in the export window popping up.
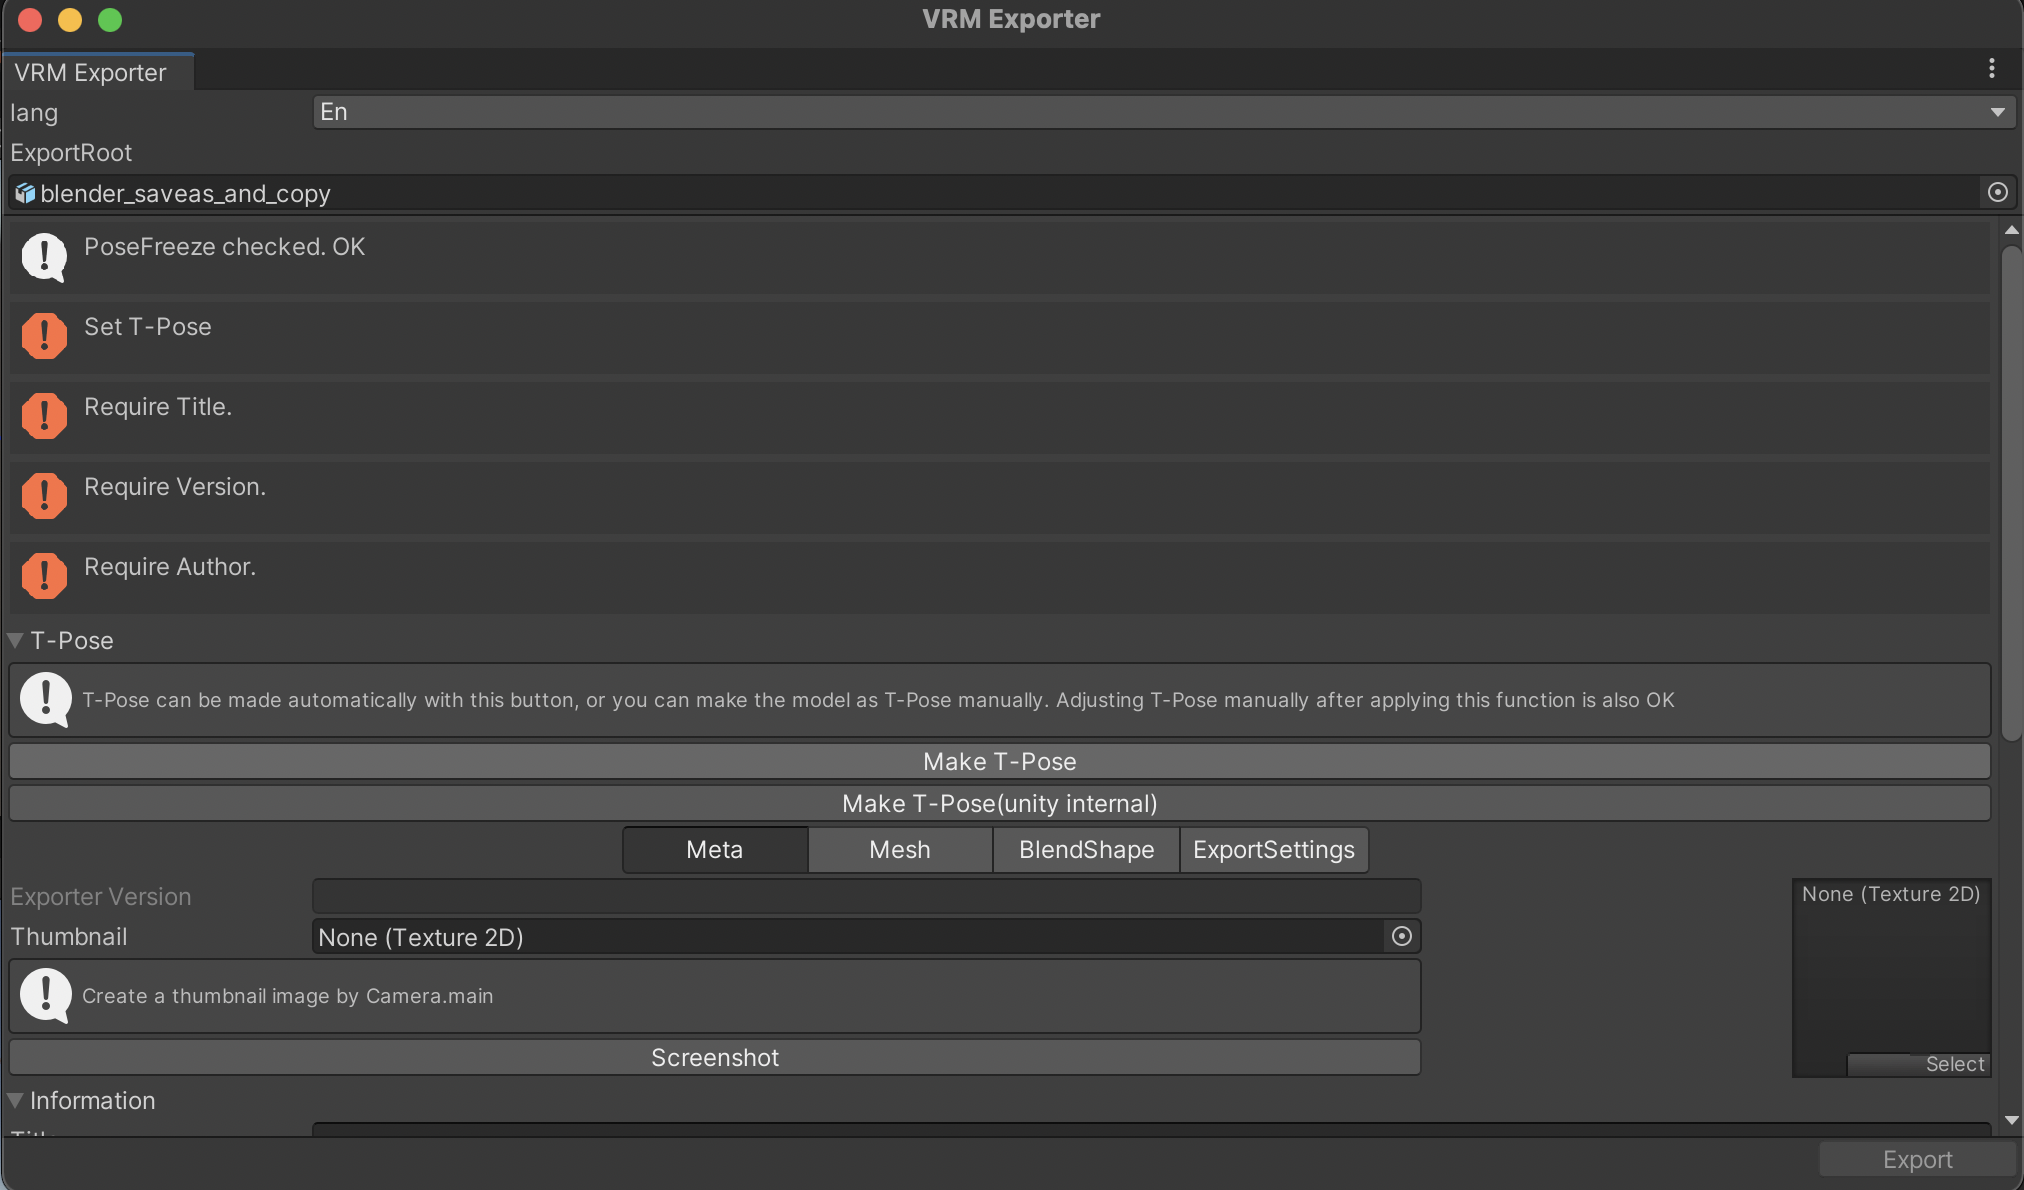
- Click on “Make T-Pose”. Scroll down a bit and enter a Title (ie. the name of your avatar), a version (e.g. 1.0) and the Author (i.e. your name). Then click Export. Choose a name like “avatar” and save the VRM file into your
vrm_assetsfolder. - Delete the avatar that you just exported from the Scene by right-clicking it in the Hierarchy and choosing Delete. This just keeps the Scene neat for later.
- Now, drag the newly-saved VRM file into the Assets window of your Unity project. It is time to configure the lip synch and facial expressions.
- Double-click on the BlendShapes asset (if you had saved the VRM file as
avatar.vrm, this asset will be called avatar.BlendShapes) to show all the expressions that can be configured. Clicking on BlendShape will allow you to easily see and configure them in one place.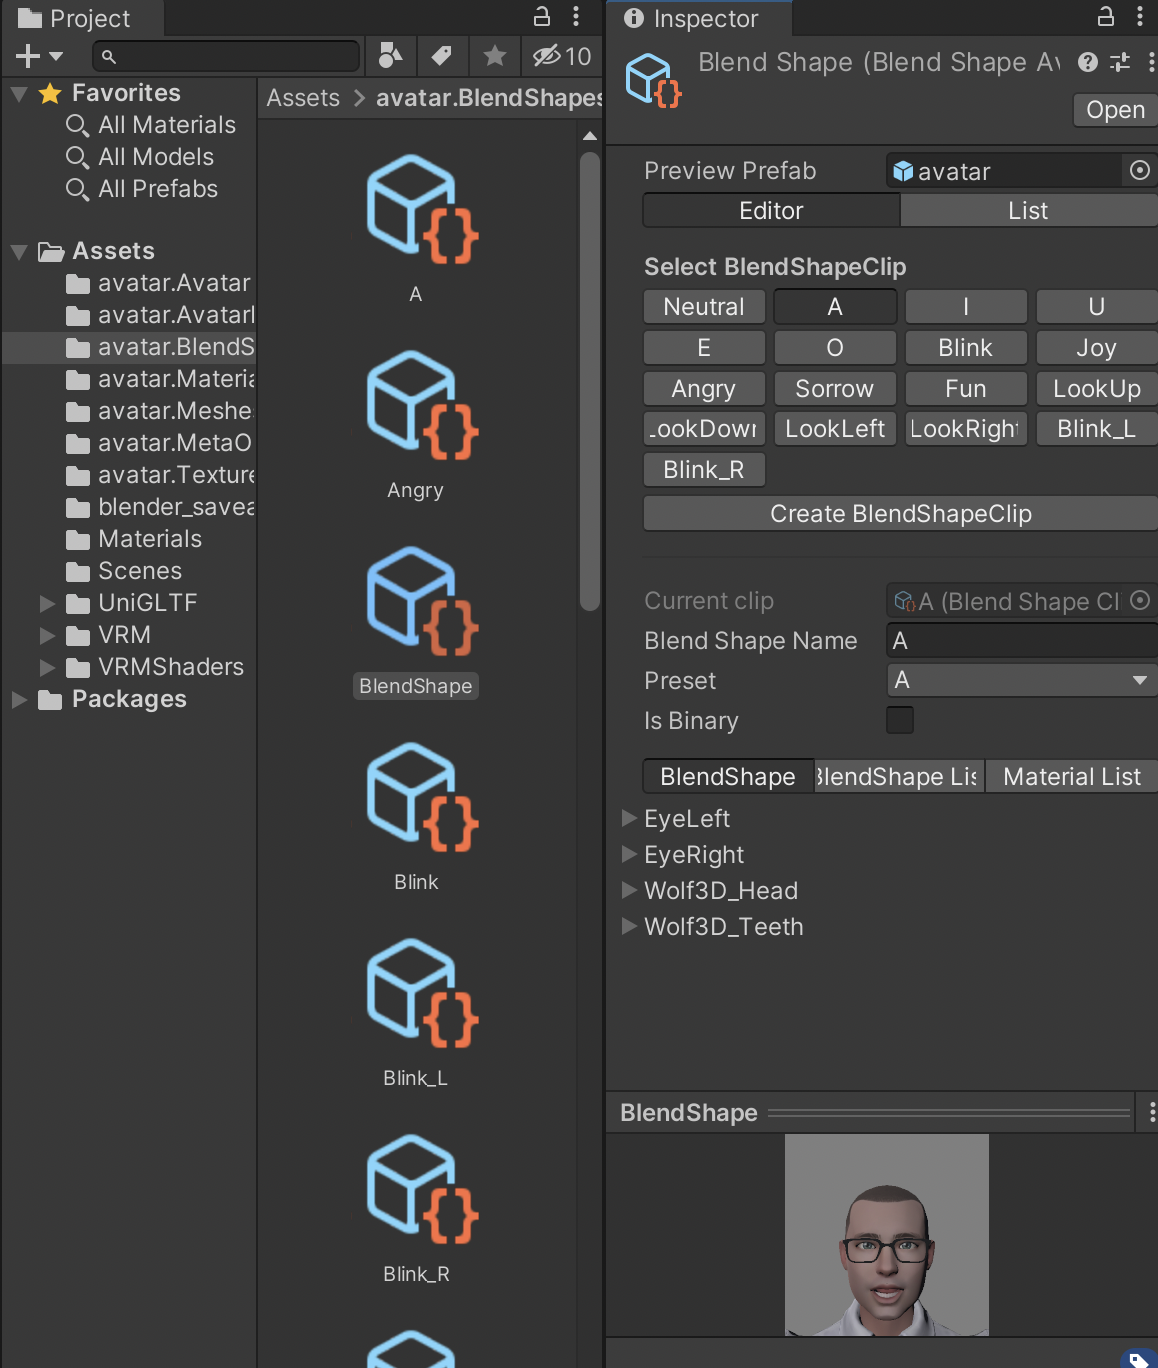
Configuring the vowels will allow lip synch to work with your avatar, but you should configure all of it to ensure your avatar doesn’t look too wooden. Note that the vowels are in the Japanese order: A, I, U, E, O. Here are the settings that I used, but different avatars will need different values.- A:
- Wolf3D_Head.viseme_aa 100
- Wolf3D_Teeth.viseme_aa 100
- I:
- Wolf3D_Head.viseme_I 100
- U:
- Wolf3D_Head.viseme_U 100
- E:
- Wolf3D_Head.viseme_E 100
- Wolf3D_Teeth.viseme_E 30
- O:
- Wolf3D_Head.viseme_O 100
- Wolf3D_Teeth.viseme_O 100
- Wolf3D_Teeth.mouthOpen 15
- Blink:
- Wolf3D_Head.eyesClosed 100
- Joy:
- Wolf3D_Head.mouthOpen 60
- Wolf3D_Head.mouthSmile 48
- Wolf3D_Head.browInnerUp 11
- Angry:
- Wolf3D_Head.mouthFrownLeft 65
- Wolf3D_Head.mouthFrownRight 65
- Wolf3D_Head.browDownLeft 20
- Wolf3D_Head.browDownRight 20
- Sorrow:
- Wolf3D_Head.mouthOpen 60
- Wolf3D_Head.mouthFrownLeft 50
- Wolf3D_Head.mouthFrownRight 50
- Wolf3D_Teeth.mouthOpen 30
- Fun:
- Wolf3D_Head.mouthSmile 50
- LookUp:
- EyeLeft.eyesLookUp 36
- EyeRight.eyesLookUp 36
- Wolf3D_Head.eyeLookUpLeft 75
- Wolf3D_Head.eyeLookUpRight 75
- LookDown:
- EyeLeft.eyesLookDown 40
- EyeRight.eyesLookDown 40
- Wolf3D_Head.eyeLookDownLeft 20
- Wolf3D_Head.eyeLookDownRight 20
- LookLeft:
- EyeLeft.eyeLookOutLeft 67
- EyeRight.eyeLookInRight 41
- LookRight:
- EyeLeft.eyeLookInLeft 41
- EyeRight.eyeLookOutRight 67
- Blink_L:
- Wolf3D_Head.eyeBlinkLeft 100
- Blink_R:
- Wolf3D_Head.eyeBlinkRight 100
- A:
- Now go back to the top level of the Assets window and scroll down to the avatar VRM model, then drag it into the Scene.
- Just as before, in the VRM0 top-level menu of Unity, select Export to VRM 0.x. You can leave the fields as they are, or update then. Click on Export. Save your VRM file into your
vrm_assetsfolder with a new name to reflect it now has the expressions configured. - Quit and save Unity, in case you want to come back and make further tweaks. You now have a VRM model.
Test out the VRM file in the avatar application of your choice! Good luck.
