A conducting robot

I play the flute in The Essendon Symphony orchestra, and in the lead-up to our March concert, the conductor asked if I might borrow a robot from work. The concert was a celebration of comics, movies and pop culture, so the robot ended up conducting part of a Dr Who music number. For those interested, here’s how I got a robot to conduct an orchestra.

The robot in question is a version 5 NAO Robot, and is a type of programmable robot used in certain high schools and universities around the world. It is about 60cm (2 feet) high, and can walk, talk, respond to speech, identify faces, and move its limbs like a human. There are Python and C++ SDKs for writing software, or you can use (like I did) a visual programming tool called Choregraphe.

Different versions of NAO are supported by different versions of Choregraphe. Based on descriptions from the NAO documentation, I could tell I had V5, and hence I needed to download V2.1 of Choregraphe from the NAO software resources webpage.

It was easy enough to follow some of the NAO tutorials to learn how to use Choregraphe. The project that I wrote is available in a GitHub repo for general interest.

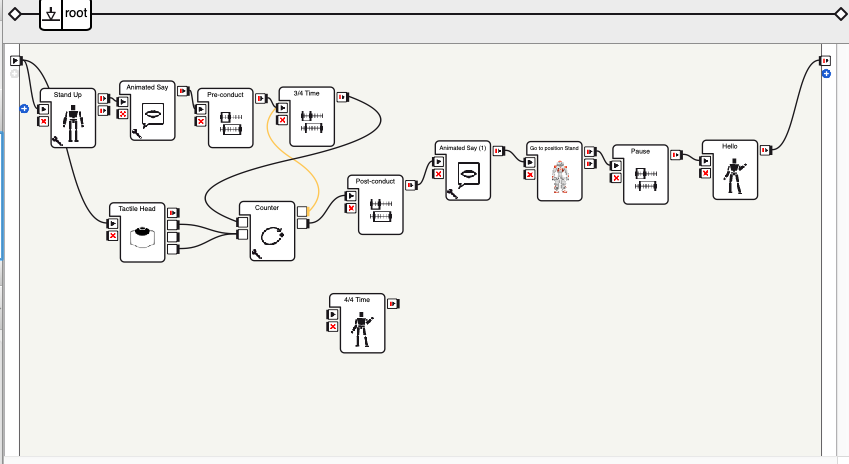
The project has blocks for conducting in 3/4 time (used in the project) and 4/4 time (not used in the project). It is set up to automatically start when the middle head sensor is touched, by using the launch trigger condition MiddleTactilTouched. After saying some amusing words, it conducts for 17 bars, controlled by the Counter box. At the same time, it is sensing for whether either of the other two head sensors are touched, and if they are, the Counter will stop the conducting. The robot will then say some more hilarious stuff, pause for a bit (for the real conductor to turn it around to face the audience), and then it will wave. Ta dah!

Learning how to use the tools and program the robot to do this sort of project took only a couple of days, so I can see how it could be useful in a highschool or university setting. The level of articulation in the joints is pretty amazing, and I look forward to this sort of technology becoming more widely available.

One issue: after getting the robot to conduct for a long period, it started to complain of over-heating, so I was comfortable with 17 bars, but I don’t think it could conduct a whole concert. But, not that the orchestra would want that!

Hacking the Alexa grammar

Amazon EchoFor Christmas, I got myself an Amazon Echo Dot (and I wasn’t the only one). For me, it’s been a fun and more convenient way to play music in our living room area, and I’ve been listening to more music as a result. I also had the idea that it would be nice to build some speech-driven interfaces to things.

It has been over a decade since I did speech recognition work. Speech recognition was used in one of the early projects that I did after I first left Uni, where I was part of a team that built a speech-driven personal assistant. It was a little ahead of its time, and never went anywhere.

Still, I thought I could put those slighty-rusty skills to use on the Echo, since Amazon provides a way to create Alexa skills (the name given to apps that run on the Echo behind the scenes). My idea was to use the Echo to provide a way to help the kids with maths, since they love to talk to “Alexa”.

Last week, my skill was published on Amazon’s list of Alexa skills. It allows someone to say “Alexa, tell me now if 1 plus 1 equals 2”, and will respond by saying that they’ve gotten this correct (or not). Unlike the basic Alexa functionality of doing maths, where someone might say “Alexa, what is 1 plus 1”, this skill forces the speaker to offer the answer and have it checked. This should be useful to anyone wanting to test their maths, and it supports addition, subtraction and multiplication. Basic users would probably use small numbers, but advanced users can use large numbers – the skill supports it all. Not negative numbers or zero, though!

Doing the coding behind this was straightforward; it was some simple Node.js code that runs on AWS Lambda. What was less straightforward was sorting out the grammar to use.

In speech recognition, the word “grammar” refers to the set of different phrases that an application can recognise at a point in time. A simple grammar is one that consists of just the phrases “yes” and “no”. A complex grammar might include every product for sale on Amazon itself and different ways to order them. The grammar is used by the speech recognition engine to improve its recognition, since it doesn’t need to always listen for every possible word in English, but only the specific words that are contained in the grammar.

To develop an Alexa skill, you need to hack together the basic Alexa grammar, together with an “invocation name”, and then the grammar that the skill itself can recognise. (Here, I’m using the word hack in its art-of-programming sense, not in the computer-intrusion sense.) Usually, the invocation name is a pronoun, e.g. “Dog Facts”, “Starbucks” or “GE Podcast Theatre”. However, it can be any set of words, and there is alternative dog fact skill that uses the invocation name “me a dog fact”.

This last one doesn’t seem to make sense until you remember that there is a grammar that comes before the invocation name. It starts with a “wake word” (one of “Alexa”, “Amazon” or “Echo”), then a variety of commands based around words like “tell”, “ask”, “start” or “open”. So, the invocation name gets added to this grammar, e.g. “Alexa, tell” + “me a dog fact” which makes a lot more sense.

Amazon publishes a list of constraints relating to invocation names. For my application, it would have been easiest to develop it using an invocation name like “Math Test” and then users would interact with it like “Alexa, ask Math Test to check if 1 plus 1 equals 2”. However, I wanted to see if I could do something that was easier for users.

Initially, I tried out the invocation name “me if”, which would produce nice interactions like “Alexa, tell me if 1 plus 1 equals 2”. However, using “if” violates one of Amazon’s constraints around invocation names, so I needed to find something else. That’s how I ended up with “me now” as my invocation name. Interactions become slightly longer, but still workable, like “Alexa, tell me now if 1 plus 1 equals 2”. To make this approach obvious to users, the skill is named “Tell Me Now”.

Now, I just need to get the kids to speak to Alexa about maths instead of music.

Pi, Python and I (part 2)

Raspberry PiIn my previous post, I talked about how I’m using a Raspberry Pi to run a Facebook backup service and provided the Python code needed to get (and maintain) a valid Facebook token to do this. This post will be discussing the actual Facebook backup service and the Python code to do that. It will be my second Python program ever (the first was in the previous post), so there will likely be better ways to do what I’ve done, although you’ll see it’s still a pretty simple exercise. (I’m happy to hear about possible improvements.)

The first thing I need to do is pull in all the Python modules that will be useful. The extra packages should’ve been installed from before. Also, because the Facebook messages will be backed-up to Gmail using its IMAP interface, the Google credentials are specified here, too. Given that those credentials are likely to be something you want to keep secret at all costs, all the more reason to run this on a home server rather than on a publicly hosted server.

from facepy import GraphAPI
import urlparse
import dateutil.parser
from crontab import CronTab
import imaplib
import time

# How many status updates to go back in time (first time, and between runs)
MAX_ITEMS = 5000
# How many items to ask for in each request
REQUEST_ITEMS = 25
# Default recipient
DEFAULT_TO = "my_gmail_acct@gmail.com" # Replace with yours
# Suffix to turn Facebook message IDs into email IDs
ID_SUFFIX = "@exportfbfeed.facebook.com"
# Gmail account
GMAIL_USER = "my_gmail_acct@gmail.com" # Replace with yours
# and its secret password
GMAIL_PASS = "S3CR3TC0D3" # Replace with yours
# Gmail folder to use (will be created if necessary)
GMAIL_FOLDER = "Facebook"

Before we get into the guts of the backup service, I first need to create a few basic functions to simplify the code that comes later. Initially, there’s a function that is used to make it easy to pull a value from the results of a call to the Facebook Graph API:

def lookupkey(the_list, the_key, the_default):
  try:
    return the_list[the_key]
  except KeyError:
    return the_default

Next a function to retrieve the Facebook username for a given Facebook user. Given that we want to back-up messages into Gmail, we have to make them look like email. So, each message will have to appear to come from a unique email address belonging to the relevant Facebook user. Since Facebook generally provides all their users with email addresses at the facebook.com domain based on their usernames, I’ve used these. However, to make it a bit more efficient, I cache the usernames in a list so that I don’t have to query Facebook again when the same person appears in the feed multiple times.

def getusername(id, friendlist):
  uname = lookupkey(friendlist, id, '')
  if '' == uname:
    uname = lookupkey(graph.get(str(id)), 'username', id)
    friendlist[id] = uname # Add the entry to the dictionary for next time
  return uname

The email standards expect times and dates to appear in particular formats, so now a function to achieve this based on whatever date format Facebook gives us:

def getnormaldate(funnydate):
  dt = dateutil.parser.parse(funnydate)
  tz = long(dt.utcoffset().total_seconds()) / 60
  tzHH = str(tz / 60).zfill(2)
  if 0 <= tz:
    tzHH = '+' + tzHH
  tzMM = str(tz % 60).zfill(2)
  return dt.strftime("%a, %d %b %Y %I:%M:%S") + ' ' + tzHH + tzMM

Next, a function to find the relevant bit of a URL to help travel back and forth in the Facebook feed. Given that the feed is returned to use from the Graph API in small chunks, we need to know how to query the next or previous chunk in order to get it all. Facebook uses a URL format to give us this information, but I want to unpack it to allow for more targeted navigation.

def getpagingpart(urlstring, part):
  url = urlparse.urlsplit(urlstring)
  qs = urlparse.parse_qs(url.query)
  return qs[part][0]

Now a function to construct the headers and body of the email from a range of information gleaned from processing the Facebook Graph API results.

def message2str(fromname, fromaddr, toname, toaddr, date, subj1, subj2, msgid, msg1, msg2, inreplyto=''):
  if '' == inreplyto:
    header = ''
  else:
    header = 'In-Reply-To: <' + inreplyto + '>\n'
  utcdate = dateutil.parser.parse(date).astimezone(dateutil.tz.tzutc()).strftime("%a %b %d %I:%M:%S %Y")
  return "From nobody {}\nFrom: {} <{}>\nTo: {} <{}>\nDate: {}\nSubject: {} - {}\nMessage-ID: <{}>\n{}Content-Type: text/html\n\n

{}{}

".format(utcdate, fromname, fromaddr, toname, toaddr, date, subj1, subj2, msgid, header, msg1, msg2)

Okay, now we've gotten all that out of the way, here's the main function to process a message obtained from the Graph API and place it in an IMAP message folder. The Facebook message is in the form of a dictionary, so we can look up the relevant parts by using keys. In particular, any comments to a message will appear in the same format, so we recurse over those as well using the same function.

Note that in a couple of places I call encode("ascii", "ignore"). This is an ugly hack that strips out all of the unicode goodness that was in the original Facebook message (which allows foreign language characters and symbols), dropping anything exotic to leave plain ASCII characters behind. However, for some reason, the Python installation on my Raspberry Pi would crash the program whenever it came across unusual characters. To ensure that everything works smoothly, I ensure that these aren't present when the text is processed later.

def printdata(data, friendlist, replytoid='', replytosub='', max=MAX_ITEMS, conn=None):
  c = 0
  for d in data:
    id = lookupkey(d, 'id', '') # get the id of the post
    msgid = id + ID_SUFFIX
    try: # get the name (and id) of the friend who posted it
      f = d['from']
      n = f['name'].encode("ascii", "ignore")
      fid = f['id']
      uname = getusername(fid, friendlist) + "@facebook.com"
    except KeyError:
      n = ''
      fid = ''
      uname = ''
    try: # get the recipient (eg. if a wall post)
      dest = d['to']
      destn = dest['name']
      destid = dest['id']
      destname = getusername(destid, friendlist) + "@facebook.com"
    except KeyError:
      destn = ''
      destid = ''
      destname = DEFAULT_TO
    t = lookupkey(d, 'type', '') # get the type of this post
    try:
      st = d['status_type']
      t += " " + st
    except KeyError:
      pass
    try: # get the message they posted
      msg = d['message'].encode("ascii", "ignore")
    except KeyError:
      msg = ''
    try: # there may also be a description
      desc = d['description'].encode("ascii", "ignore")
      if '' == msg:
        msg = desc
      else:
        msg = msg + "
\n" + desc except KeyError: pass try: # get an associated image img = d['picture'] msg = msg + '
\n' except KeyError: img = '' try: # get link details if they exist ln = d['link'] ln = '
\nlink' except KeyError: ln = '' try: # get the date date = d['created_time'] date = getnormaldate(date) except KeyError: date = '' if '' == msg: continue if '' == replytoid: email = message2str(n, uname, destn, destname, date, t, id, msgid, msg, ln) else: email = message2str(n, uname, destn, destname, date, 'Re: ' + replytosub, replytoid, msgid, msg, ln, replytoid + ID_SUFFIX) if conn: conn.append(GMAIL_FOLDER, "", time.time(), email) else: print email print "----------" try: # process comments if there are any comments = d['comments'] commentdata = comments['data'] printdata(commentdata, friendlist, replytoid=id, replytosub=t, conn=conn) except KeyError: pass c += 1 if c == max: break return c

The last bit of the program uses these functions to perform the backup and to set up a cron job to run the program again every hour. Here's how it works..

First, I grab the Facebook Graph API token that the previous program (setupfbtoken.py) provided, and initialise the module that will be used to query it.

# Initialise the Graph API with a valid access token
try:
  with open("fbtoken.txt", "r") as f:
    oauth_access_token = f.read()
except IOError:
  print 'Run setupfbtoken.py first'
  exit(-1)

# See https://developers.facebook.com/docs/reference/api/user/
graph = GraphAPI(oauth_access_token)

Next, I set up the connection to Gmail that will be used to store the messages using the credentials from before.

# Setup mail connection
mailconnection = imaplib.IMAP4_SSL('imap.gmail.com')
mailconnection.login(GMAIL_USER, GMAIL_PASS)
mailconnection.create(GMAIL_FOLDER)

Now we just need to initialise some things that will be used in the main loop: the cache of the Facebook usernames, the count of the number of status updates to read, and the timestamp that marks the point in time to begin reading status from. This last one is to ensure that we don't keep uploading the same messages again and again, and the timestamp is kept in the file fbtimestamp.txt.

friendlist = {}

countdown = MAX_ITEMS
try:
  with open("fbtimestamp.txt", "r") as f:
    since = '&since=' + f.read()
except IOError:
  since = ''

Now we do the actual work, reading the status feed and processing them:

stream = graph.get('me/home?limit=' + str(REQUEST_ITEMS) + since)
newsince = ''
while stream and 0 < countdown:
  streamdata = stream['data']
  numitems = printdata(streamdata, friendlist, max=countdown, conn=mailconnection)
  if 0 == numitems:
    break;
  countdown -= numitems
  try: # get the link to ask for next (going back in time another step)
    p = stream['paging']
    next = p['next']
    if '' == newsince:
      try:
        prev = p['previous']
        newsince = getpagingpart(prev, 'since')
      except KeyError:
        pass
  except KeyError:
    break
  until = '&until=' + getpagingpart(next, 'until')
  stream = graph.get('me/home?limit=' + str(REQUEST_ITEMS) + since + until)

Now we clean things up: record the new timestamp and close the connection to Gmail.

if '' != newsince:
  with open("fbtimestamp.txt", "w") as f:
    f.write(newsince) # Record the new timestamp for next time

mailconnection.logout()

Finally, we set up a cron job to keep the status updates flowing. As you can probably guess from this code snippet, this all is meant to be saved in a file called exportfbfeed.py.

cron = CronTab() # get crontab for the current user
if [] == cron.find_comment("exportfbfeed"):
  job = cron.new(command="python ~/exportfbfeed.py", comment="exportfbfeed")
  job.minute.on(0) # run this script @hourly, on the hour
  cron.write()

Alright. Well, that was a little longer than I thought it would be. However, the bit that does the actual work is not very big. (No sniggering, people. This is a family show.)

It's been interesting to see how stable the Raspberry Pi has been. While it wasn't designed to be a home server, it's been running fine for me for weeks.

There was an additional benefit to this backup service that I hadn't expected. Since all my email and Facebook messages are now in the one place, I can easily search the lot of them from a single query. In fact, the Facebook search feature isn't very extensive, so it's great that I can now do Google searches to look for things people have sent me via Facebook. It's been a pretty successful project for me and I'm glad I got the chance to play with a Raspberry Pi.

For those that want the original source code files, rather than cut-and-pasting from this blog, you can download them here:

If you end up using this for something, let me know!
Pi, Python and I (part 1)

Raspberry PiI’ve been on Facebook for almost six years now, and active for almost five. This is a long time in Internet time.

Facebook has, captured within it, the majority of my interactions with my friends. Many of them have stopped blogging and just share via Facebook, now. (Although, at least two have started blogging actively in the last year or so, and perhaps all is not lost.) At the start, I wasn’t completely convinced it would still be around – these things tended to grow and then fade within just a few years. So, I wasn’t too concerned about all the *stuff* that Facebook would accumulate and control. I don’t expect them to do anything nefarious with it, but I don’t expect them to look after it, either.

However, I’ve had a slowly building sense that I should do something about it. What if Facebook glitched, and accidentally deleted everything? There’s nothing essential in there, but there are plenty of memories I’d like to preserve. I really wanted my own backup of my interactions with my friends, in the same way I have my own copies of emails that I’ve exchanged with people over the years. (Although, fewer people seem to email these days, and again they just share via Facebook.)

The trigger to finally do something about this was when every geek I knew seemed to have got themselves a Raspberry Pi. I tried to think of an excuse to get one myself, and didn’t have to think too hard. I could finally sort out this Facebook backup issue.

Part of the terms of my web host are that I can’t run any “robots” – it’s purely meant to handle incoming web requests. Also, none of the computers at home are on all the time, as we only have tablets, laptops and phones. I didn’t have a server that I could run backup software on.. but a Raspberry Pi could be that server.

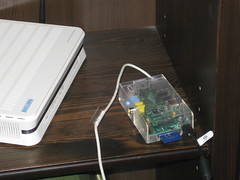
For those who came in late, the Raspberry Pi is a tiny, single-board computer that came out last year, is designed and built in the UK, and (above all) is really, really cheap. I ordered mine from the local distributor, Element14, whose prices start at just under $30 for the Model A. To make it work, you need to at least provide a micro-USB power supply ($5 if you just want to plug it into your car, but more like $20 if you want to plug it into the wall) and a Micro SD card ($5-$10) to provide the disk, so it’s close to $60, unless you already have those to hand. You can get the Model B, which is about $12 more and gets you both more memory and an Ethernet port, which is what I did. You’ll need to find an Ethernet cable as well, in that case ($4).

When a computer comes that cheap, you can afford to get one for projects that would otherwise be too expensive to justify. You can give them to kids to tinker with and there’s no huge financial loss if they brick them. Also, while cheap, they can do decent graphics through an HDMI port, and have been compared to a Microsoft Xbox. No wonder they managed to sell a million units in their first year. Really, I’m a bit slow on the uptake with the Raspberry Pi, but I got there in the end.

While you can run other operating systems onto it, if you get a pre-configured SD card, it comes with a form of Linux called Raspbian and has a programming language called Python set up ready to go. Hence, I figured as well as getting my Facebook backup going, I could use this as an excuse to teach myself Python. I’d looked at it briefly a few years back, but this would be the first time I’d used it in anger. I’ll document here the steps I went through to implement my project, in case anyone else wants to do something similar or just wants to learn from this (if only to learn how simple it is).

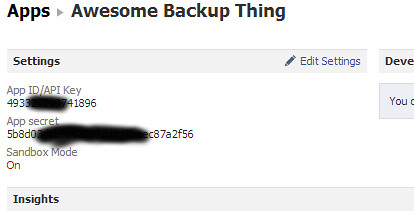
The first thing to do is to head over to developers.facebook.com and create a new “App” that will have the permissions that I’ll use to read my Facebook  feed. Once I logged in, I chose “Apps” from the toolbar at the top and clicked on “Create New App”. I gave my app a cool name (like “Awesome Backup Thing”) and clicked on “Continue”, passed the security check to keep out robots, and the app was created. The App ID and App secret are important and should be recorded somewhere for later.

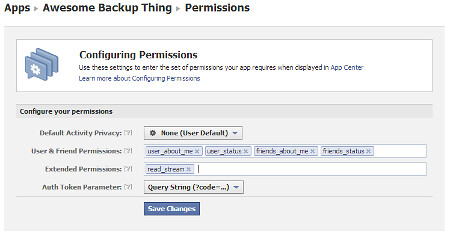
Now I just needed to give it the right permissions. Under the Settings menu, I clicked on “Permissions”, then added in the ones needed into the relevant fields. For what I want, I needed: user_about_me, user_status, friends_about_me, friends_status, and read_stream. “Save Changes” and this step is done. Actually, I’m not sure if this is technically needed, given the next step.

Now I needed to get a token that can be used by the software on the server to query Facebook from time to time. The easiest way is to go to the Graph API Explorer, accessible under the “Tools” menu in the toolbar.

I changed the Application specified in the top right corner to Awesome Backup Thing (insert your name here), then clicked on “Get access token”. Now I need to specify the same permissions as before, across the three tabs of User Data Permissions (user_about_me, user_status), Friends Data Permissions (friends_about_me, friends_status) and Extended Permissions (read_stream). Lastly, I clicked on “Get Access Token”, clicked “OK” to the Facebook confirmation page that appeared, and returned to the Graph API explorer where there was a new token waiting for me in the “Access token” textbox. It’ll be needed later, but it’s valid for about two hours. If you need to generate another one, just click “Get access token” again.

Now it’s time to return to the Pi. Once I logged in, I needed to set up some additional Python packages like this:

$ sudo pip install facepy
$ sudo pip install python-dateutil
$ sudo pip install python-crontab

And then I was ready to write some code. The first thing was to write the code that will keep my access token valid. The one that Facebook provides via the Graph API Explorer expires too quickly and can’t be renewed, so it needs to be turned into a renewable access token with a longer life. This new token then needs to be recorded somewhere so that we can use it for the backing-up. Luckily, this is pretty easy to do with those Python packages. The code looks like this (you’ll need to put in the App ID, App Secret, and Access Token that Facebook gave you):

# Write a long-lived Facebook token to a file and setup cron job to maintain it
import facepy
from crontab import CronTab
import datetime

APP_ID = '1234567890' # Replace with yours
APP_SECRET = 'abcdef123456' # Replace with yours

try:
  with open("fbtoken.txt", "r") as f:
  old_token = f.read()
except IOError:
  old_token = ''
if '' == old_token:
  # Need to get old_token from https://developers.facebook.com/tools/explorer/
  old_token = 'FooBarBaz' # Replace with yours

new_token, expires_on = facepy.utils.get_extended_access_token(old_token, APP_ID, APP_SECRET)

with open("fbtoken.txt", "w") as f:
  f.write(new_token)

cron = CronTab() # get crontab for the current user
for oldjob in cron.find_comment("fbtokenrenew"):
  cron.remove(oldjob)
job = cron.new(command="python ~/setupfbtoken.py", comment="fbtokenrenew")
renew_date = expires_on - datetime.timedelta(1)
job.minute.on(0)
job.hour.on(1) # 1:00am
job.dom.on(renew_date.day)
job.month.on(renew_date.month) # on the day before it's meant to expire
cron.write()

Apologies for the pretty rudimentary Python coding, but it was my first program. The only other things to explain are that the program sits in the home directory as the file “setupfbtoken.py” and when it runs, it writes the long-lived token to “fbtoken.txt” then sets up a cron-job to refresh the token before it expires, by running itself again.

I’ll finish off the rest of the code in the next post.

A Java ME coder looks at Android

I’ve had a long association with Java programming.

I started playing around with Java software development back in 1995, before the platform was even released as version 1.0. In 2001, I got my hands on a Siemens SL45i handset and began to develop using Java ME (known as J2ME at the time), a cut-down version of Java for embedded devices such as mobile phones. For a time, I worked for mobile games developer Glu (known as Macrospace at the time) porting games to different Java ME handsets.

That’s all just so I can say that I got to know a lot of the ins and outs of doing Java development for mobiles. Although, I haven’t really done much of that recently, and these days Java ME has fallen out of favour, with the rise of smartphones that support other software platforms. However, Android-based smartphones are now becoming popular, and Android applications are written using Java.

So, I was rather curious as to what developing on Android was like, and over the last couple of months, I’ve spent an hour or two every 2-3 days tinkering around with an Android project as a hobby. This was my chief diversion during the weeks after our daughter was born in November.

I didn’t do an Android course or read an Android book. I simply took what Google provided on Android and ran with it, to see what I would learn.

Getting going

Google makes a lot of really good information and tools for Android available for free. I was able to easily set up a development environment on our laptop (an old Dell Inspiron 1501). Unlike if I’d been developing for, say, the Apple iPhone, I didn’t need to get a specific brand of computer, nor pay anyone to join their development program. In fact, they even make the full source code for Android available if you want to see how it works under the hood.

It made me think how empowering this is for people. In years gone by, if you wanted to tweak your car (or even build a car up from parts), you could easily get access to the information and tools to do it yourself. For modern cars, that’s not really the case. However, it is the case for your modern mobile phone, and given how important a tool it has become in our daily lives, that’s a really liberating thing.

In fact, our particular laptop has a comparable amount of grunt to a modern mobile phone (such as an HTC Desire), so it’s no wonder I find myself doing more tasks on a handset rather than this laptop. In addition, while with Java ME, it was common to test the software on an emulator (e.g. running on the laptop) before loading it onto a real device, but here, the inability of the laptop to emulate a modern handset at anything like real speed made that impractical. Also, the Android adb tool does a great job of exposing logging and debug information in real-time from devices, so there’s no real penalty in testing directly on the device.

Also due to the lack of grunt, rather than using the normal Eclipse development environment, I ended up using the much more lightweight ant and vi tools. Not very pretty, but fast on my machine.

Developing

Android development is theoretically done using the full Java SE, rather than the cut-down Java ME. While it is true that there is a lot more power and flexibility in the hands of developers than there was for Java ME, there are still a lot of wrinkles that make it unlike full Java SE.

Three examples of these wrinkles are:

  1. AndroidManifest.xml: This is a text file that is included in every Android app, and basically describes how the system should interact with the app. Instead of this being specified in the Java code, it needs to be separately documented here. For example, it specifies which icons appear in the list of launchable applications and which classes should be invoked when those icons are selected. It also specifies how other applications on the device might interwork with the app.
  2. Activity-oriented architecture: Every Android app is basically broken into components of four different types. These are the Activity (an interactive screen of some kind), Service (an invisible, background task), ContentProvider (a database-like interface to some content), and a BroadcastReceiver (waits for a system-wide event to perform a task upon). These components communicate with each other using a type of message called an Intent, which is typically a URI and some associated metadata. (My small hobby application used a ContentProvider, a Service, and several Activities.)
  3. Dalvik Virtual Machine: Instead of compiled Java bytecode running on a Java virtual machine (the typical approach for Java SE), the compiled Java bytecode is converted into Dalvik bytecode and that is run on the Dalvik virtual machine. This is a pretty clever way to allow developers to reuse the well-known Java tools but allow the Android system to operate outside of them. However, as the Java to Dalvik conversion doesn’t have full knowledge of the original source code, it seems to find it difficult to optimise things automatically, and leads to strange advice like manually copying class fields into local variables to make execution more efficient.

Another interesting thing, from a mobile developer perspective, is that Android manages a “stack” of screens (Activities) in a similar way that was done for the old WAP/WML 1.1 browsers (and HDML browsers before them). The developer can push screens onto the stack in various ways, while the user hits the back button to pop them off. Given that this approach was dropped from the newer versions of WAP (and in the newer mobile browsers that followed), it is with some nostalgia that I see it come back again. However, it does make a lot of sense for mobile handsets and their small screens (i.e. the impracticality of having several windows open side-by-side).

Difficulties

While the Android SDK gives the developer a lot of power, it wasn’t as easy to use as I’d hoped. Not that Java ME was easy, by any means, but Android’s design and development has probably resulted in some strangeness that Java ME avoided.

You have to remember that Java ME evolved in a (some would say ponderously) slow fashion. It was effectively the product of a standards organisation, with a lot of smart minds spending time arguing about small details. For example, while JSR-37 (the original specification of the version of Java ME for mobile phones) was published in September 1999, it took until August 2002 for the specification for sending a text message to become available (JSR-120). The final result was typically elegant, consistent with overall Java ME design philosophy, and extensively documented. But you didn’t want to hold your breath for it.

I was developing to Android v2.2, which was the 8th release of the platform (not counting revisions). There had been five separate releases of the platform in the previous year (from the 3rd release in April 2009 to the 8th release in May 2010). It has been evolving very quickly, so I wasn’t too shocked to find things worked in unexpected ways.

I found the Android API library to be a bit confusing. Classes weren’t always in the packages that I expected to find them. For example, while Activity and Service are in android.app, ContentProvider and BroadcastReceiver are in android.content. Also, some UI elements are in android.view and others are in android.widget. And while some standard icons were available as constant values, others needed to be copied as files out of the SDK.

The Activity-oriented software architecture also took a while to get used to. It turned out that although one method I tried to use (startActivity) was available on some classes (such as a Service), they would throw an error if called because they were only meant to be called from particular components (an Activity, in this case).

Additionally, while ordinarily an application runs in a single process, it uses a number of threads. There is one special thread called the UI Thread. Again, one method that I tried to use (showDialog) was available in a class, but silently failed when it was called from a thread other than the UI Thread. In practice, you need to use an Android construct called a Handler to pass messages from one thread to another to allow the right thread to invoke the right method.

Also, seemingly harkening back to the days of Java ME, the media library seemed to have frustrating bugs. One API call I was expecting to use as documented (MediaPlayer.setDataSource) turned out not to work at all, and that I had to specify a FileDescriptor rather than a file path to load a media file. Also, another API (MediaPlayer.getCurrentPosition) returned completely erroneous values, and I had to develop a work-around. Thank goodness for StackOverflow in both these cases.

Conclusions

In the end, I got my little app working nicely. It was very satisfying to find that there was the ability to effectively add a new feature into my phone.

In that sense, Android gives user-developers a lot of power. And while I was expecting it to be a straightforward Java SE like development exercise, I discovered that it had a lot more in common with Java ME development. I had hoped that such platforms would easily attract the large pool of desktop developers, but it seems that there is still a mobile-specific learning curve that a developer will need to go through, and this will shrink the available pool of expert developers.

That said, I hope that Java developers will take a look at Android and see what kind of features they can innovate on top of it. As for myself, I hope to find the time for another hobby project again soon.

Open Source Economy

I’ve been writing open source software for a while now. Not that I’m prolific or anything. However, I’ve released most of what I’ve written under open licences. From my point of view, this means I give the source code away with the software, so that people who use it can learn from it, tinker with it, improve it and make uses of it that I’ve never thought of.

Probably my first piece of software that was widely used was something called MIDIMOD, which I published back in 1993. It ran on MS-DOS, and converted one type of music file format to another. I wrote it because I wanted a software tool to do that, and it turned out that some others did too.

Copyright law prevents anyone copying your intellectual work. However, you can provide people with a licence to copy it under certain conditions specified in that licence. Under the Berne Convention, you don’t have to do anything special to get copyright – it applies by default. My software had a licence included with it that allowed anyone to provide the software to anyone else, but they had to provide the source code as well. That way, whomever got the software, no matter who from, could tinker with it. This attribute is shared with the GPL (Gnu Public Licence), one of the most famous open source licences.

About ten years after my small piece of open source software was released into the world, the country of Brazil chose to adopt open source software in their government as a major policy initiative. And just a couple of weeks ago, the President of Brazil accepted from ITU the World Telecommunication and Information Society Award. In accepting the award, President Lula noted the importance of the promotion of open source in establishing an inclusive society.

Brazil is one of the four “BRIC” countries, an acronym coined from the first initials of Brazil, Russia, India and China. BRIC is a term used in economic circles, as those countries are known to be fast-growing, developing nations that may be the dominant economies within fifty years. So, they are certainly ones to watch.

Aside from the initial cost savings of Brazil adopting open source software (which is typically free to licence), the choice of this model is intended to create long-term economic benefits for the country. Rather than importing non-open source software from other countries, primarily USA, Brazil is fostering a local software development community that can tinker with the software the government uses to make it better suited to their evolving needs. Also, since software is typically used to create all types of intellectual property these days, it ensures that the intellectual property created by the government is not locked to software that can be maintained only by its creator, who may choose to give up on it, e.g. if it’s no longer in their commercial interest to do so.

This far-sighted approach by the government of a potential future economic super-power is perhaps instructive for those of us in countries that will likely never be a super-power. Australia could be promoting similar approaches. Who knows – in a decade, perhaps we, too, could be receiving an award from the ITU.