Gluten-Free Sourdough

I was late to lockdown-driven sourdough baking. It wasn’t until Melbourne’s second lockdown, in August 2020, that I finally got on the sourdough bandwagon. However, I have kept my sourdough starter alive since then, so I’ve achieved the ten-month milestone!

Still, if I was to share my starter with someone else, or, not that I want to think about it, fell sick and someone else needed to keep it going, my sourdough regime isn’t documented anywhere yet. This post is intended to record what I’ve been doing, and it’s a little bit different to other sourdough feeding approaches that I’ve read online.

It’s not radical or anything. It just suits me and my needs in two ways. Firstly, the sourdough starter is gluten-free. Secondly, it is pretty cheap given that it gets minimal feeding – only 20g of flour each week – unless I’m baking something.

Before I describe it, I’d like to credit my main inspirations for the technique I use:

Feeding Regime

I keep my sourdough starter in the fridge, and then one morning on the weekend, I remove it and allow it to warm up. This allows the starter to get active again, and after a few hours, it will be creating bubbles.

a jar with sourdough starter and in the background is a bag of brown rice flour and a bag of glutinous rice flour

As you can see here, I keep my sourdough starter in a small glass jar, and mark the fill level with a rubber band, in traditional style. In this picture, it has risen a little and looks bubbly. Note that this is basically as bubbly as it gets, unlike many pictures of other sourdough starters that you see online. However, it still seems to work perfectly fine for baking.

An empty glass jar on a scales with sourdough starter in a nearby glass

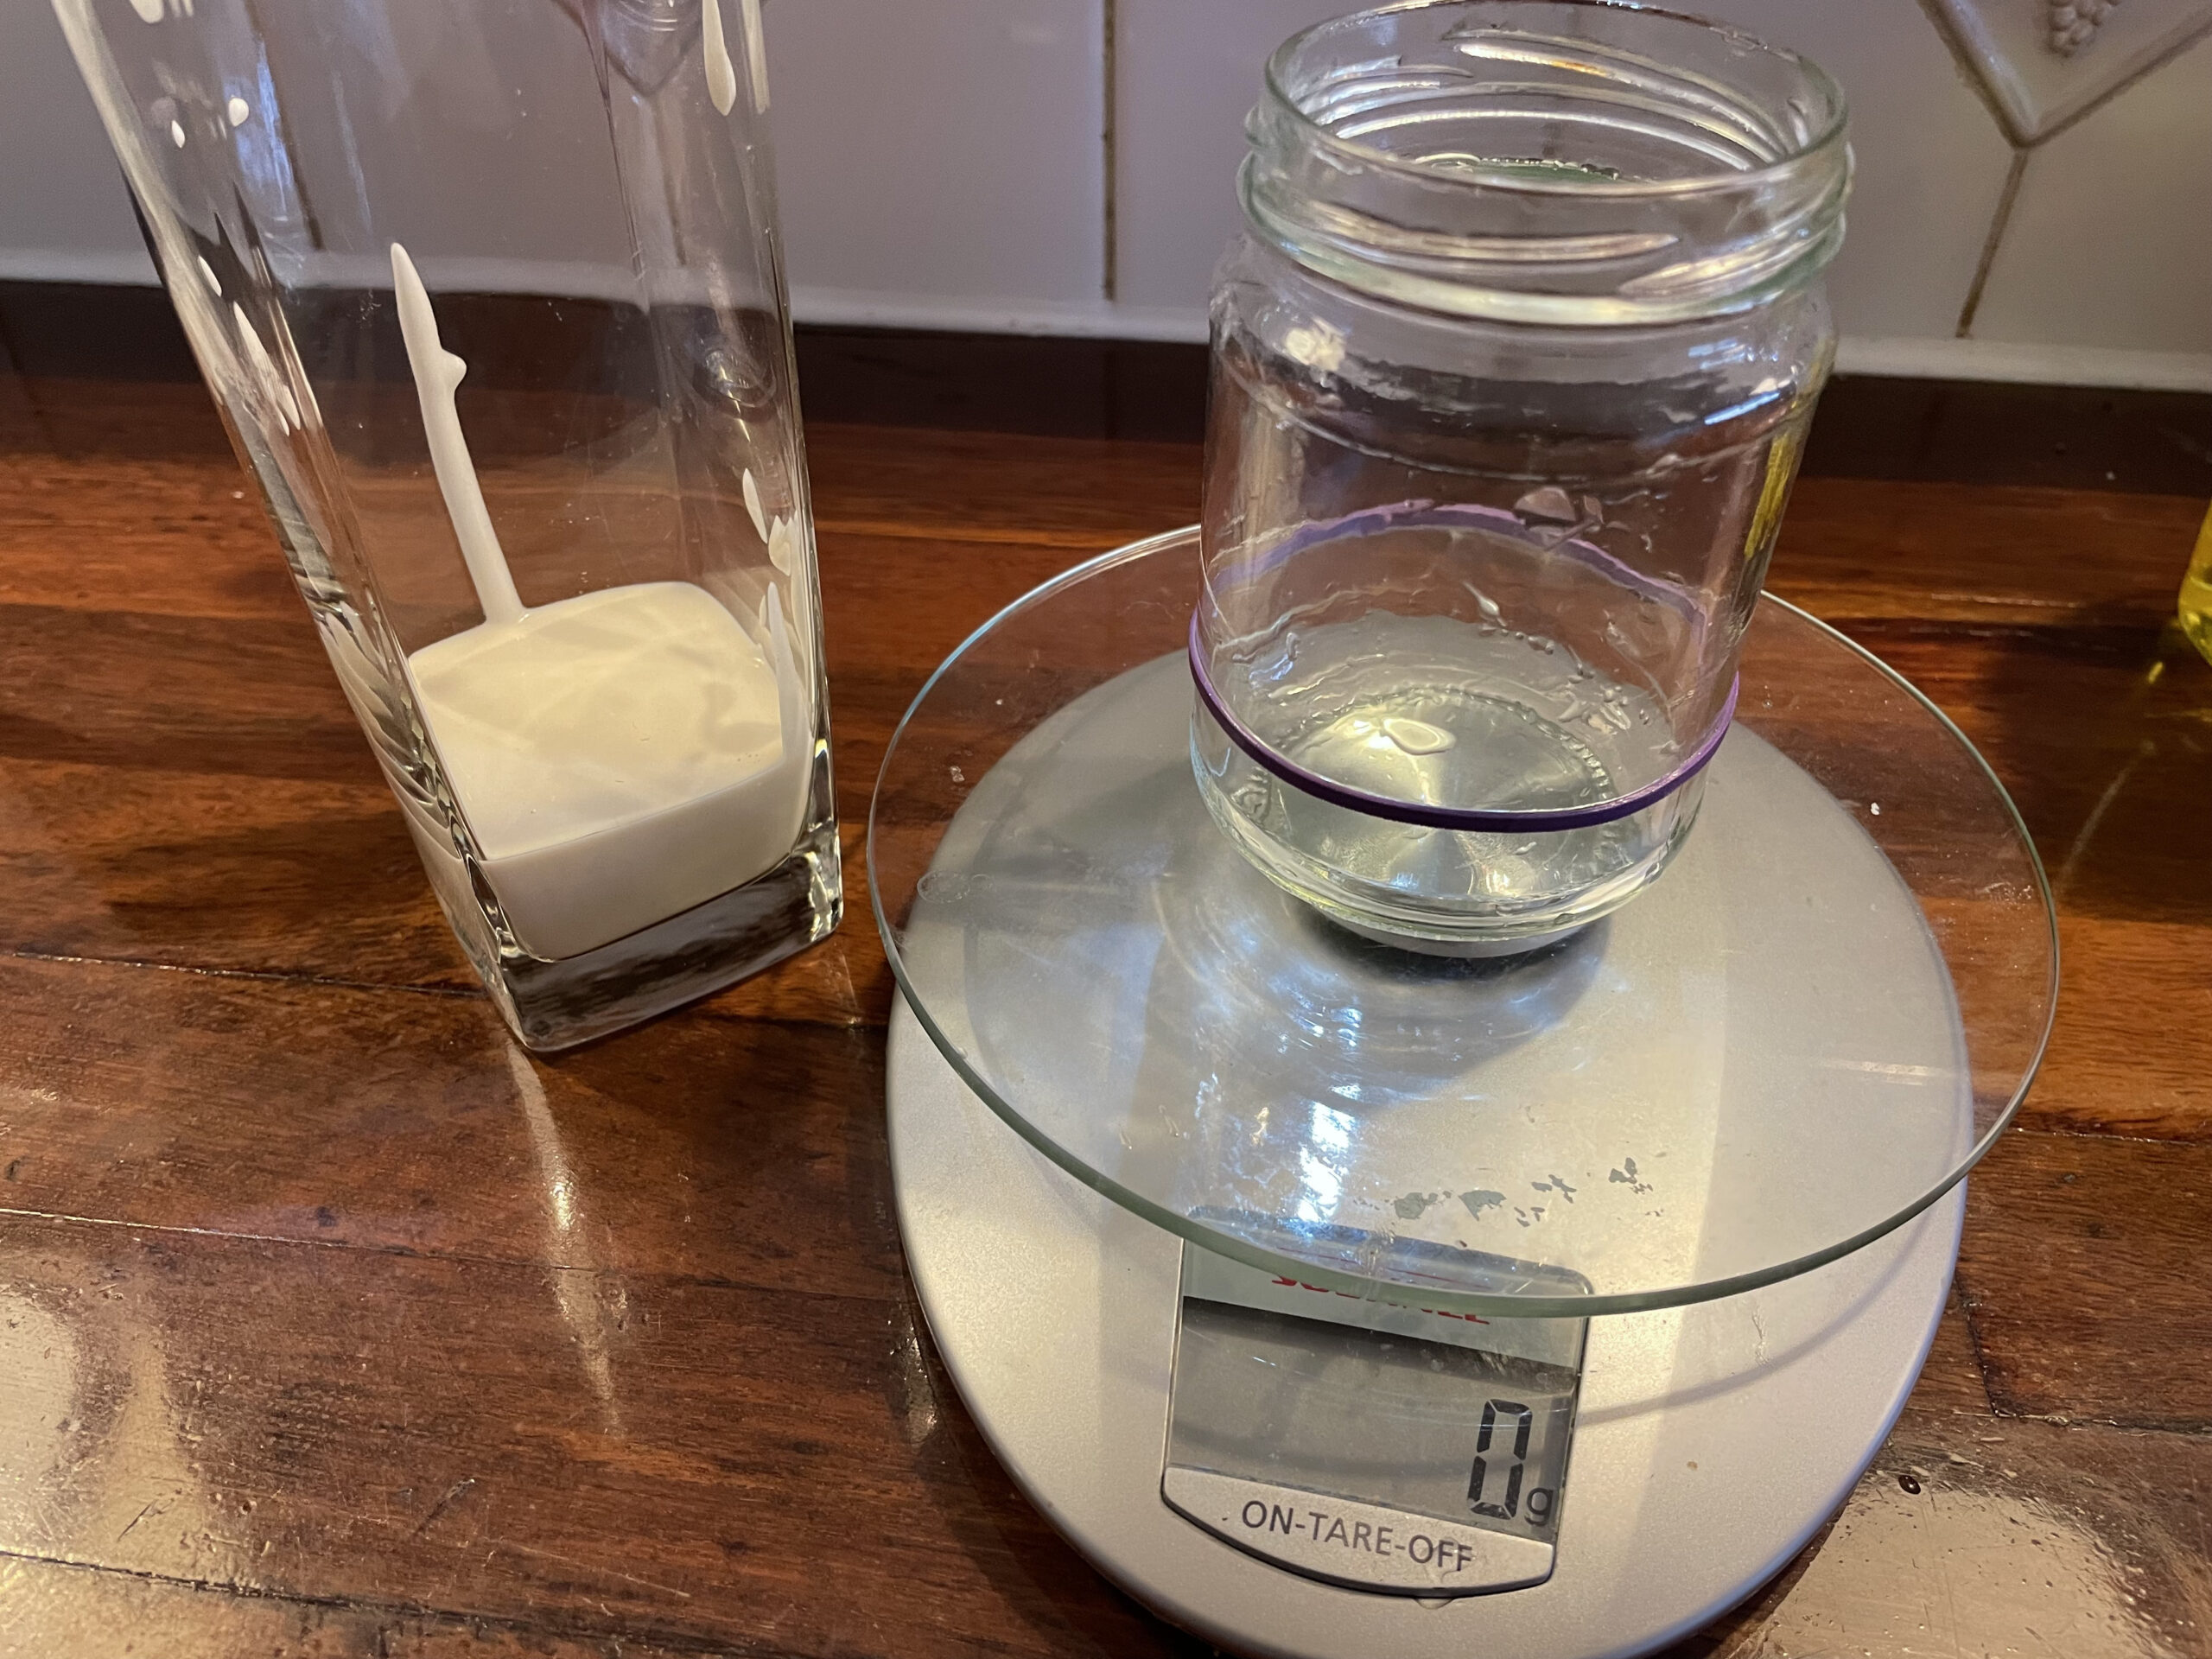
The first thing I do is open the glass jar and smell it. It should smell sweet and yeasty, but if it doesn’t, I throw it out and use some of my earlier discard (see below), but I’ve had to do that only once. Next, I stir it with a fork, and scrape out the glass jar into a drinking glass that is good for pouring. I then give the glass jar a good rinse and put it on the kitchen scales. The scales need to be pretty accurate, and the ones I have are accurate to about 1 gram.

21 grams of sourdough starter measured into the glass jar with the remaining starter in a nearby glass and another glass container nearby with discard

I measure 20 grams (or close to it) of starter back into the glass jar, and scrape the rest of it into another jar that I use to keep the discard. The discard jar holds up to about 180 grams, which is a good amount for some of the recipes that I use. The discard jar is always stored in the fridge.

23 grams of water measured into the glass jar with the remaining water in a glass nearby

I now rinse out the drinking glass and partially fill it with lukewarm water from the tap. In Melbourne, the tap water is completely fine for sourdough. I pour about 20 grams (or a little more) of water into the glass jar, on top of the 20 grams of sourdough starter from before. Don’t tip out the rest of the water yet, though.

20 grams of flour measured into the glass jar with the bags of flour in the background

I now measure 20 grams of flour, which is equal parts brown rice flour and glutinous rice flour (also known as sticky rice flour or sweet rice flour). The glutinous rice flour is cheap and readily found at the supermarket. The brown rice flour is an organic brand, which helps ensure appropriate micro-organisms are being introduced.

A dry, lumpy mixture in a glass jar with a fork in it

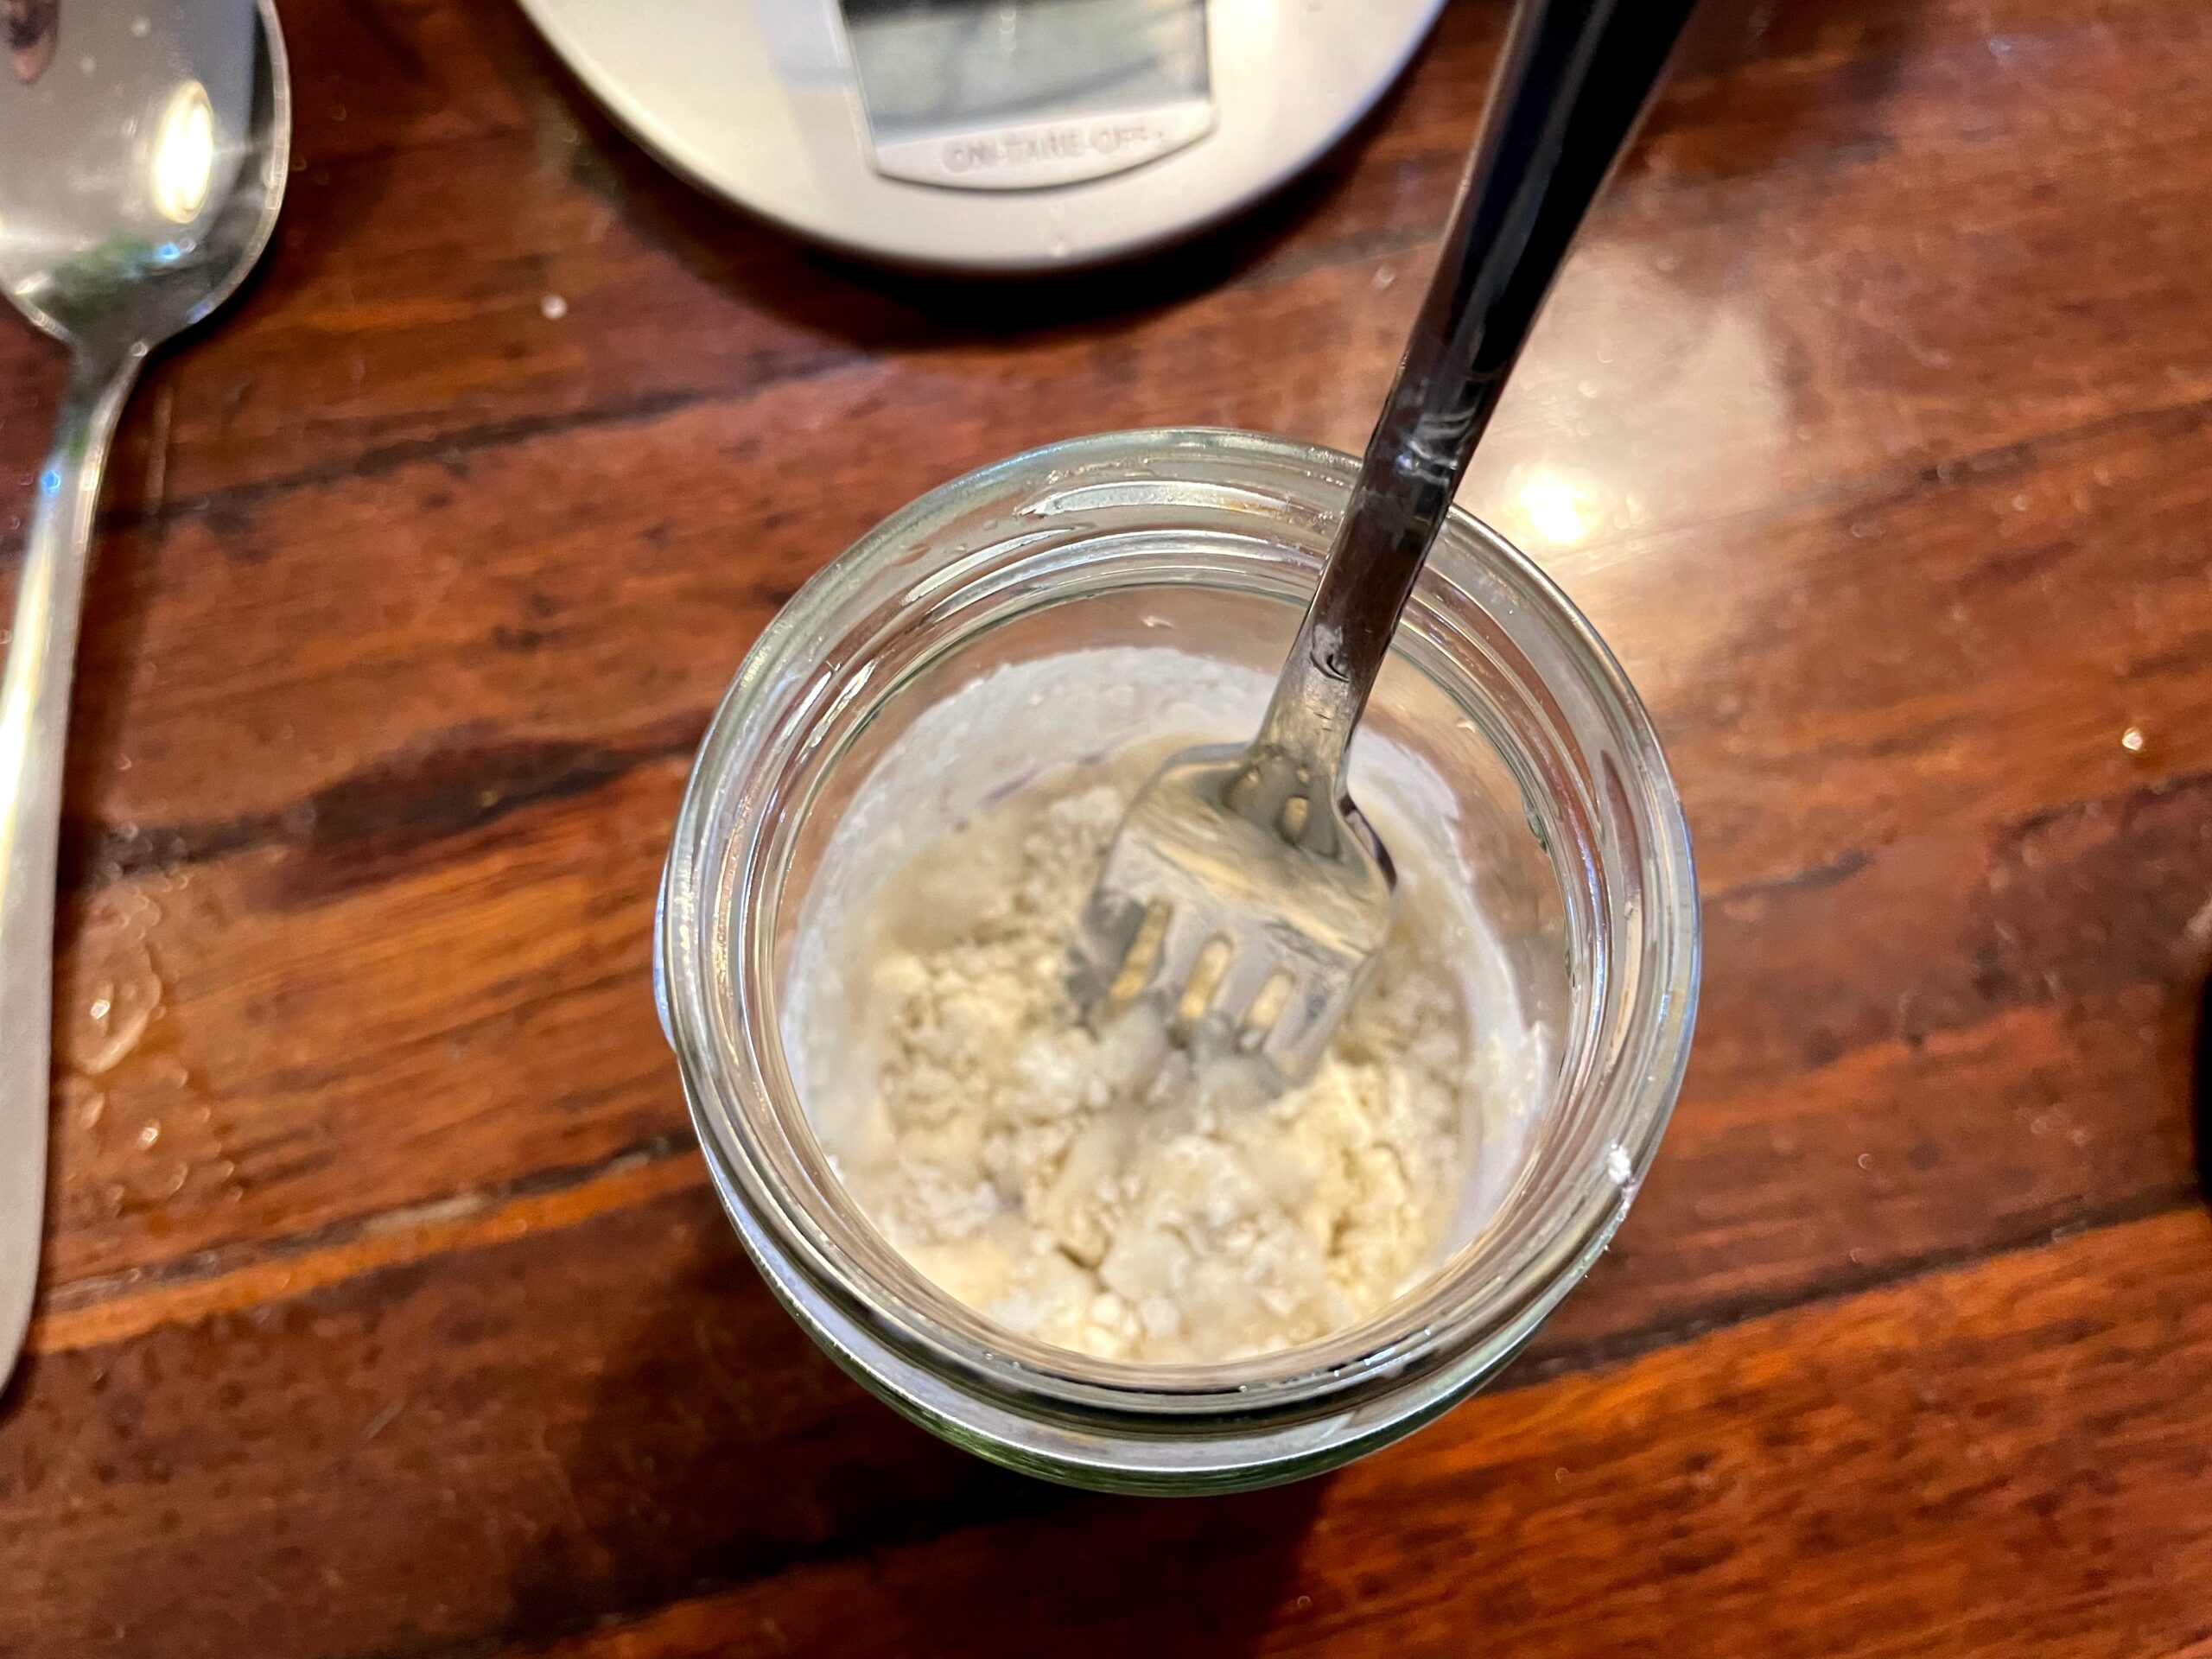
I mix it all together with a fork, and at this point, it may be too dry. If so, I spoon in a very small amount of additional water, until I can mix it into a smooth, thick paste.

A thick and smooth mixture in a glass jar

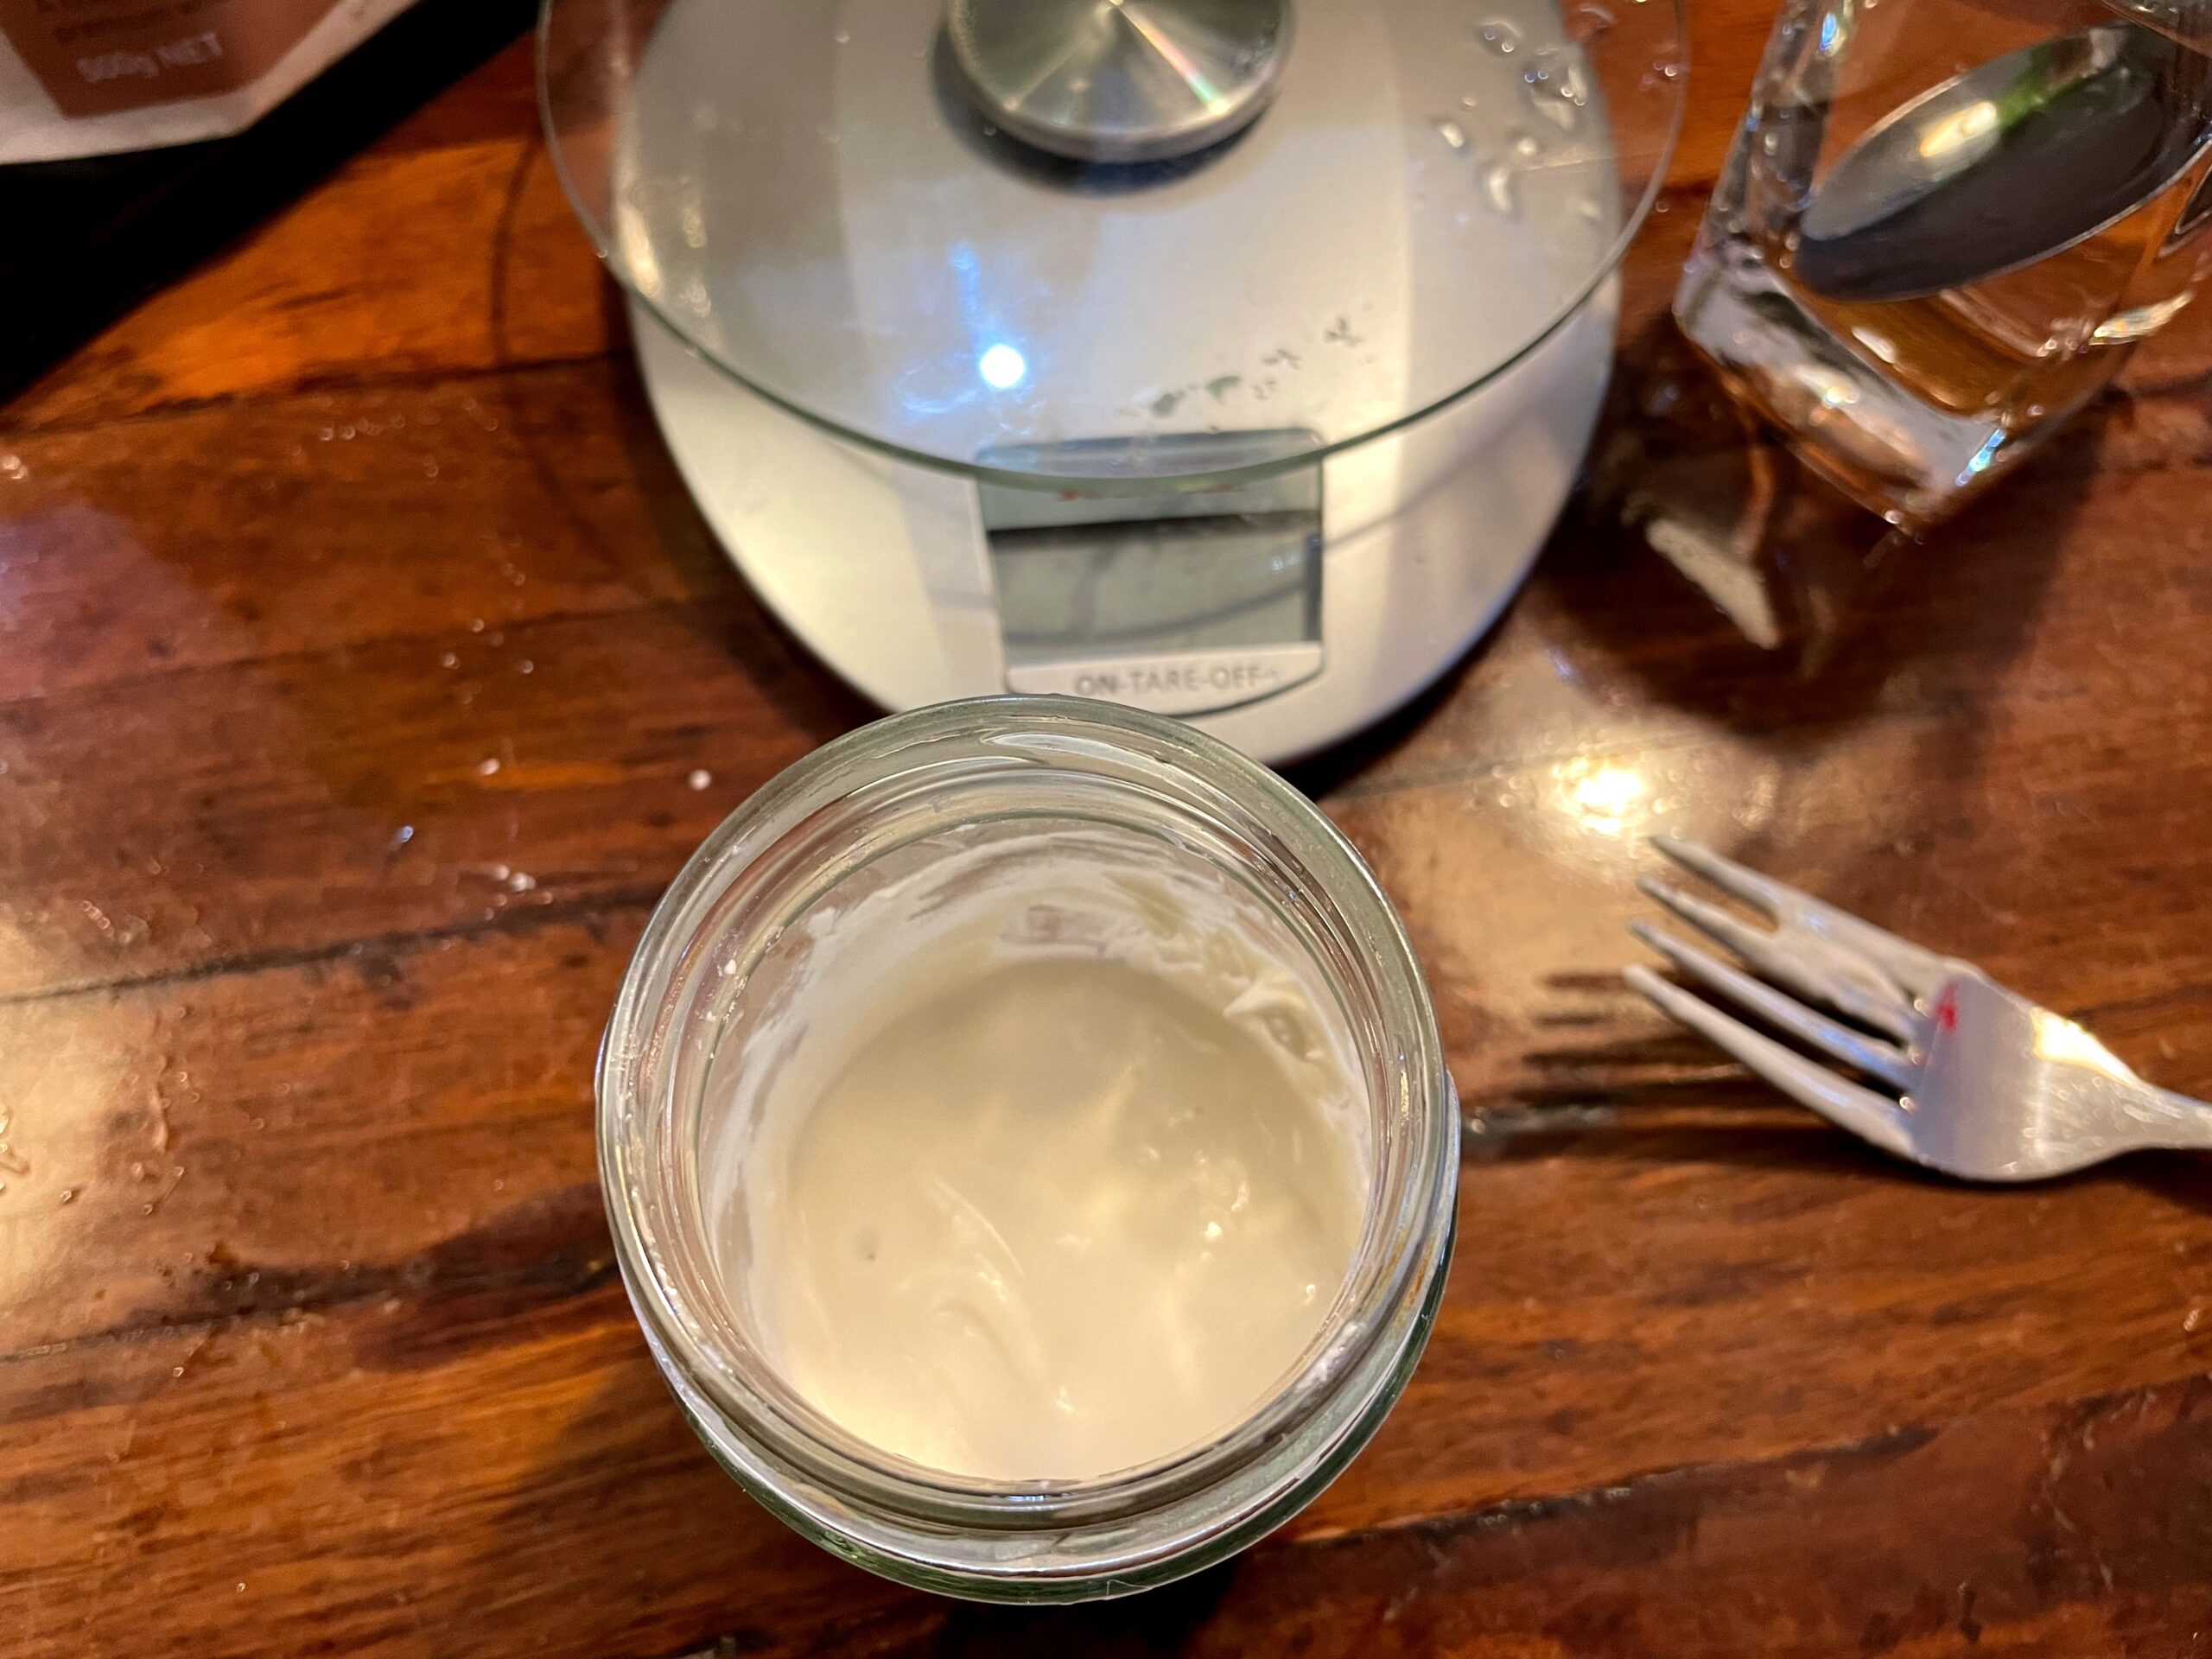
The result should be something like thickshake consistency, but it doesn’t hurt the sourdough if it’s a bit runnier. The weights given above are for a “100% hydration” sourdough starter, which is what most sourdough recipes assume, so if the starter is runny, you’ll need to deal with that when baking. However, if you’re not baking, you can just be more careful at the next feed, and the ratio should come right.

I leave the starter in its glass jar for a few hours until very tiny bubbles are just visible, and then I pop it back in the fridge for another week.

The way I’ve described this above, it probably sounds very finicky. In practice, it takes about 5 minutes of work per week, with the rest of the time spent simply leaving a glass jar on the kitchen bench or in the fridge. All up, it’s not much effort to maintain the sourdough starter so it can be used to bake amazing things.

Baking approach

If I’m going to do some sourdough baking, there are two things to address. Firstly, sourdough that is straight from the fridge needs some time to become properly active. Secondly, most recipes seem to assume there is 150 grams of starter available. These can both be dealt with together, but it does take a couple of days.

To get up to 150 grams, I remove the starter from the fridge and follow an approach similar to a normal feed as described, but with an intent to bulk up the starter rather than maintain the size of the starter. The glass jar won’t hold 150 grams of starter, so to bulk up the starter, I need to scrape it out into a bigger container. There is about 60 grams of starter in the glass jar, but in practice, about 50 grams can be scraped out.

So, you can do 50 grams starter + 50 grams water + 50 grams flour to get to the required 150 grams. However, this doesn’t leave any starter to continue with. In theory, you can use previous discard if there’s some, but I would do this as a last resort.

Instead, I put 20 grams starter back into the glass jar and feed it as usual (and put it back into the fridge), and put 30 grams into a new container, with 30 grams water + 30 grams flour, which gets to about 90 grams. I leave this for a full day, then discard 40 grams, and add 50 grams water + 50 grams flour, to get to 150 grams. It should be fine to bake with the next day, as it will be active and the right size.

If you’ve read through all of this and want to follow this approach yourself for gluten-free sourdough starter, I hope it was clear. Please let me know how you go!

Minecraft Cake – Alex

Last year, my eldest daughter requested a Minecraft cake, and I made one by covering a butter cake with a mosiac of Minecraft-style tiles made from sugar cubes (coloured with different types of cordial syrup). It looked amazing, but was a lot of work. So, this year, when she asked for a Minecraft cake again, I wanted to do something a little less complicated.

The finished cake

The spec was a girl Minecraft character, lying down, made out of chocolate cake (inspired by this cake). As you can see, it looked just like the character Alex, and was almost all gone by the end of the party, so was pretty tasty, too. It was a chocolate butter cake, filled with chocolate butter cream, and coated with white chocolate ganache. If you want to do something similar, here’s what I did.

Ingredients 1 (chocolate butter cake)

  • 190g unsalted butter
  • 1/2 teaspoon vanilla extract
  • 1 cup caster sugar
  • 3 eggs
  • 2 1/4 cups of self-raising flour (minus 2 tablespoons)
  • 2 tablespoons cocoa powder
  • 1/2 cup milk

Method 1 (chocolate butter cake)

  1. This is based on the butter cake recipe from The Women’s Weekly Children’s Birthday Cake book. Firstly, get the oven warming at 190 degrees Celcius.
  2. Grease and line a large tin, 30cm x 21cm x 5cm. You can probably use something narrower if you need to, but the length is important.
  3. Bring butter to room-temperature if it isn’t already. I usually place it on a plate in about 1cm thick slices and zap in the microwave for 30s at 50% power.
  4. Place butter and vanilla in a mixer, and beat until light and creamy. Add sugar gradually while beaters are running at slow to combine. Add eggs one by one and give it a good beat after each to ensure it comes together.
  5. Remove bowl from the mixer, and sift in half the flour. Add half the milk and return to the mixer until combined. Then do the same thing again with the rest of the flour and milk, except this time include the cocoa powder with the sifted flour.
  6. You should have a thick mixture that can be dollopped into the greased tin. Smooth the top to ensure it’s level.
  7. Bake in the oven for 25-30 minutes or until a skewer comes out clean.
  8. Cool for a couple of minutes in the tin, then remove and and cool on a wire rack overnight. This will ensure cake is completely cool and can be most easily cut to shape the cake design.

The cake, baked

Ingredients 2 (white chocolate ganache)

  • 1 cup (250 mL) thickened cream (35% fat)
  • 660g of white chocolate melts

Method 2 (white chocolate ganache)

  1. Place the chocolate melts into a metal (or glass) bowl, and place on the stove over a saucepan with a little bit of water. (Note, if you want to make milk or dark chocolate ganache, you need to use a ratio of closer to 2g:1mL.)
  2. Pour the cream into a small saucepan, and heat on the stove until it is simmering temperature.
  3. Remove the small saucepan from the stove, and pour the cream into the chocolate. Stir until the mixture is smooth.
  4. Remove from the stove, allow to cool for a couple of minutes, and then put in the fridge for a couple of hours to stiffen. Note that this will (most likely!) make more ganache than you need, but it’s better to err on the safe side.

Ingredients 3 (chocolate butter cream)

  • 125g unsalted butter
  • 1 1/2 cups icing sugar (minus 1 heaped tablespoon)
  • 1 heaped tablespoon of drinking chocolate
  • 2 tablespoons milk

Method 3 (chocolate butter cream)

  1. This is also fromĀ The Women’s Weekly Children’s Birthday Cake book. Firstly, ensure the butter is at room temperature, e.g. using the technique above. This time, also ensure the milk is at room temperature.
  2. Put the butter in the bowl of a mixer and beat until it is as white as possible.
  3. Sift the icing sugar and drinking chocolate into another bowl, and gradually add about half of it into the butter with the mixer running.
  4. Add the milk gradually, then gradually add in the remaining sifted icing sugar.

Method 4 (constructing the cake)

  1. Days earlier, I had created a design for an icing sheet that would be used to decorate the exterior of the cake. This was based on the Alex design at Pixel PaperCraft.Minecraft cake template
  2. I uploaded this to an icing sheet printing service – in this case, I used CustomIcing.com.au – and had them print it onto an A3 sheet. I got it in the post a couple of days later, and kept it in a cold place until I needed it.
  3. I cut the cooled cake into three pieces. Two were 7cm x 7cm x 2.5cm squares that would be used for the head. The other was a T-shaped piece that was 21cm long, and 14cm wide at its widest point, but 7cm wide at its narrowest. This was actually a mistake, and it should have been more like 12.5cm wide at its widest point (the arms are 3 blocks wide each not 4 blocks). In any case, the exact measurements will depend on the icing sheet, so take measurements from that, and allow at least 0.5cm for icing.Pieces of cake
  4. Next, slice the T-shaped piece in half horizontally, so that it can be filled with the butter cream.
  5. Spread butter cream between the two square pieces and sandwich together. Place onto the plate or platter that will be used to present the cake. Also, spread butter cream into the T-shaped piece. Join with the square piece to make the shape of a block person (note the square piece is taller than the rest of the cake). If there isn’t enough butter cream coming right to the edge, pipe butter cream along the gap.Filled cake
  6. Remove the ganache from the fridge and use a palette knife to spread a decent coating over the cake. It’s okay if it gets crumbs in it or looks a bit rough at this point.Covered with ganache
  7. Place the cake in the fridge for the ganache to firm up again, and in the mean-time prepare the icing sheet.
  8. Cut along the outside of each of the shapes on the icing sheet using a sharp knife and a ruler. Also, cut along the base of the arm a little, so the hands are not connected to the legs.
  9. Remove the cake from the fridge. Using a jug of hot water and a tea towel, keep the palette knife hot (but dry) and shape the ganache so that it is smooth, level and has distinct corners. Also, use a ruler to ensure that the ganache-covered cake matches the measurements of the design on the icing sheet. You may want to trim off some of the cake, reapply ganache, refrigerate again and smooth the ganache before going on.
  10. Gently pick up the design from the icing sheet, peeling it away from the backing material. Slowly lower it onto the cake, possibly using a second person at this point! It is probably best to start with the legs and then lower the head piece on last. It is very easy to rip the icing sheet.
  11. Carefully smooth the icing sheet onto the ganache, and then return to the fridge until it is needed.The finished cake
  12. Eat it! It was devoured quickly by a dozen kids and a couple of nearby adults.The cake, finished